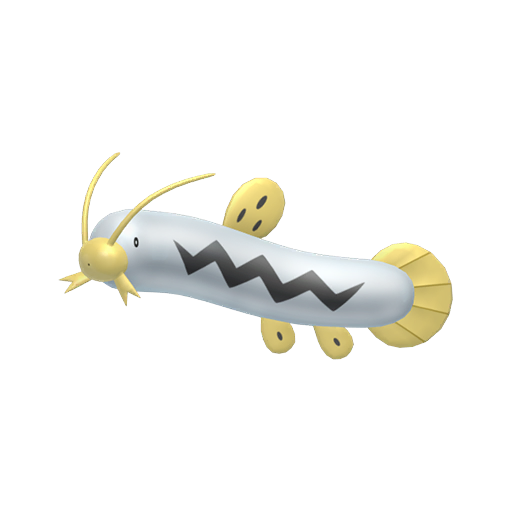
PadrãoShiny


Competitivo
In-Game
Abilities
Oblivious: Este Pokémon não pode ficar apaixonado ou ser provocado (Taunt). É imune a Intimidate.
Anticipation: Ao dar switch-in, este Pokémon "estremece" se algum Pokémon adversário tiver um Move superefetivo ou de OHKO.
Hydration(H): Este Pokémon tem seu status curados ao final de cada turno se Rain Dance estiver ativo.
Base stats
HP
Atk
Def
SpA
SpD
Spe
Level 50
Level 100
110 157
210 304
47 110
90 214
43 104
81 203
45 107
87 210
41 102
78 199
58 123
112 240
Dano recebido
 ×1
×1 ×1
×1 ×1
×1 ×0
×0 ×1
×1 ×1
×1 ×½
×½ ×1
×1 ×1
×1 ×4
×4 ×1
×1 ×1
×1 ×1
×1 ×½
×½ ×1
×1 ×½
×½ ×½
×½ ×1
×1Moves que aprende
SV
SS
USM
ORAS
BW
DPP
ADV
| Move | Tipo | Categoria | Power | PP | Descrição | |
|---|---|---|---|---|---|---|
| Amnesia Level up Machine |  | — | — | 20 | Aumenta a Sp. Def do usuário em 2 estágios. | |
| Aqua Tail Level up |  | 90 | 90 | 10 | Nenhum efeito adicional. | |
| Blizzard Machine |  | 110 | 70 | 5 | Tem 10% de chance de congelar os adversários. Não erra na neve. | |
| Bulldoze Machine | | 60 | 100 | 20 | Tem 100% de chance de reduzir a Speed de adversários em 1 estágio. | |
| Chilling Water Machine | | 50 | 100 | 20 | Tem 100% de chance de diminuir o Attack do alvo em 1 estágio. | |
| Double-Edge Machine | | 120 | 100 | 15 | Tem 33% de recoil. | |
| Dragon Dance Machine | | — | — | 20 | Aumenta o Attack e a Speed do usuário em 1 estágio. | |
| Earth Power Machine | | 90 | 100 | 10 | Tem 10% de chance de diminuir a Sp. Def do alvo em 1 estágio. | |
| Earthquake Level up Machine | | 100 | 100 | 10 | Atinge Pokémon adjacentes. Causa o dobro de dano em Dig. | |
| Endure Machine | | — | — | 10 | O usuário sobrevive aos ataques neste turno com pelo menos 1 HP. | |
| Facade Machine | | 70 | 100 | 20 | O Power dobra se o usuário estiver com burn/poison/paralysis. | |
| Fissure Level up | | — | 30 | 5 | Derrota o alvo em OHKO. Falha se o usuário tiver um level inferior. | |
| Flail Egg | | — | 100 | 15 | Mais Power quanto menos HP o usuário tiver. | |
| Future Sight Level up Machine | | 120 | 100 | 10 | Ataca por dois turnos após ser usado. | |
| Helping Hand Machine | | — | — | 20 | O Power do Move de um aliado adjacente é 1,5x maior neste turno. | |
| High Horsepower Machine | | 95 | 95 | 10 | Nenhum efeito adicional. | |
| Hydro Pump Machine | | 110 | 80 | 5 | Nenhum efeito adicional. | |
| Ice Beam Machine | | 90 | 100 | 10 | Tem 10% de chance de congelar o alvo. | |
| Icy Wind Machine | | 55 | 95 | 15 | Tem 100% de chance de diminuir a Speed dos adversários em 1 estágio. | |
| Liquidation Machine | | 85 | 100 | 10 | Tem 20% de chance de diminuir a Defense do alvo em 1 estágio. | |
| Muddy Water Level up Machine | | 90 | 85 | 10 | Tem 30% de chance de diminuir a accuracy dos adversários em 1 estágio. | |
| Mud Shot Machine | | 55 | 95 | 15 | Tem 100% de chance de diminuir a Speed do alvo em 1 estágio. | |
| Mud-Slap Level up Machine | | 20 | 100 | 10 | Tem 100% de chance de diminuir a Accuracy do alvo em 1 estágio. | |
| Outrage Machine | | 120 | 100 | 10 | Dura 2-3 turnos. Confunde o usuário depois. | |
| Protect Machine | | — | — | 10 | Impede que Moves afetem o usuário neste turno. | |
| Rain Dance Machine | | — | — | 5 | Durante 5 turnos, uma forte chuva empodera Moves do tipo Water. | |
| Rest Level up Machine | | — | — | 5 | O usuário dorme por 2 turnos e restaura o seu HP e status. | |
| Rock Slide Machine | | 75 | 90 | 10 | Tem 30% de chance de causar flinch. | |
| Rock Tomb Machine | | 60 | 95 | 15 | Tem 100% de chance de diminuir a Speed do alvo em 1 estágio. | |
| Sandstorm Machine | | — | — | 10 | Durante 5 turnos, cria uma tempestade de areia. Rock-types têm a Sp. Def aumentada em 1,5x. | |
| Sleep Talk Machine | | — | — | 10 | O usuário deve estar dormindo. Usa outro Move conhecido. | |
| Snore Level up | | 50 | 100 | 15 | O usuário deve estar dormindo. Tem 30% de chance de causar flinch. | |
| Spark Egg | | 65 | 100 | 20 | Tem 30% de chance de paralisar o alvo. | |
| Stealth Rock Machine | | — | — | 20 | Um hazard que causa dano nos adversário ao darem switch-in. O dano varia conforme a fraqueza dos adversários ao tipo Rock. | |
| Stomping Tantrum Machine | | 75 | 100 | 10 | O Power dobra se o último Move do usuário tiver falhado. | |
| Stone Edge Machine | | 100 | 80 | 5 | Tem altas chances de critical hit. | |
| Substitute Machine | | — | — | 10 | O usuário perde 1/4 de seu HP máximo para colocar um substitute. | |
| Sunny Day Machine | | — | — | 5 | Durante 5 turnos, uma intensa luz solar empodera Moves do tipo Fire. | |
| Surf Machine | | 90 | 100 | 15 | Atinge Pokémon adjacentes. Dano duplo em Dive. | |
| Swift Machine | | 60 | — | 20 | Este Move não verifica accuracy. Atinge adversários adjacentes. | |
| Take Down Machine Egg | | 90 | 85 | 20 | Tem 1/4 de recoil. | |
| Tera Blast Machine | | 80 | 100 | 10 | Se o usuário estiver Terastalizado, o Move será físico se o seu Atk for maior que o Sp. Atk, e o tipo será igual ao Tera Type. | |
| Thrash Egg | | 120 | 100 | 10 | Dura 2-3 turnos. Confunde o usuário depois. | |
| Waterfall Machine | | 80 | 100 | 15 | Tem 20% de chance de causar flinch. | |
| Water Gun Level up | | 40 | 100 | 25 | Nenhum efeito adicional. | |
| Water Pulse Level up Machine | | 60 | 100 | 20 | Tem 20% de chance de confundir o alvo. | |
| Whirlpool Machine | | 35 | 85 | 15 | Prende o alvo e causa dano por 4-5 turnos. | |
| Zen Headbutt Machine | | 80 | 90 | 15 | Tem 20% de chance de causar flinch. |


| Move | Tipo | Categoria | Power | PP | Descrição | |
|---|---|---|---|---|---|---|
| Amnesia Level up Machine | | — | — | 20 | Aumenta a Sp. Def do usuário em 2 estágios. | |
| Aqua Tail Level up | | 90 | 90 | 10 | Nenhum efeito adicional. | |
| Attract Machine | | — | 100 | 15 | Um alvo do gênero oposto fica apaixonado. | |
| Blizzard Machine | | 110 | 70 | 5 | Tem 10% de chance de congelar os adversários. Não erra na neve. | |
| Bounce Machine | | 85 | 85 | 5 | Salta no turno 1. Ataca no turno 2. Tem 30% de chance de paralisar. | |
| Bulldoze Machine | | 60 | 100 | 20 | Tem 100% de chance de reduzir a Speed de adversários em 1 estágio. | |
| Dive Machine | | 80 | 100 | 10 | Mergulha no turno 1, ataca turno 2. | |
| Dragon Dance Machine | | — | — | 20 | Aumenta o Attack e a Speed do usuário em 1 estágio. | |
| Earth Power Machine | | 90 | 100 | 10 | Tem 10% de chance de diminuir a Sp. Def do alvo em 1 estágio. | |
| Earthquake Level up Machine | | 100 | 100 | 10 | Atinge Pokémon adjacentes. Causa o dobro de dano em Dig. | |
| Endure Machine | | — | — | 10 | O usuário sobrevive aos ataques neste turno com pelo menos 1 HP. | |
| Facade Machine | | 70 | 100 | 20 | O Power dobra se o usuário estiver com burn/poison/paralysis. | |
| Fissure Level up | | — | 30 | 5 | Derrota o alvo em OHKO. Falha se o usuário tiver um level inferior. | |
| Flail Egg | | — | 100 | 15 | Mais Power quanto menos HP o usuário tiver. | |
| Future Sight Level up Machine | | 120 | 100 | 10 | Ataca por dois turnos após ser usado. | |
| Hail Machine | | — | — | 10 | Por 5 turnos, faz cair granizo. | |
| Hydro Pump Machine | | 110 | 80 | 5 | Nenhum efeito adicional. | |
| Ice Beam Machine | | 90 | 100 | 10 | Tem 10% de chance de congelar o alvo. | |
| Icy Wind Machine | | 55 | 95 | 15 | Tem 100% de chance de diminuir a Speed dos adversários em 1 estágio. | |
| Muddy Water Level up Machine | | 90 | 85 | 10 | Tem 30% de chance de diminuir a accuracy dos adversários em 1 estágio. | |
| Mud Shot Machine | | 55 | 95 | 15 | Tem 100% de chance de diminuir a Speed do alvo em 1 estágio. | |
| Mud-Slap Level up | | 20 | 100 | 10 | Tem 100% de chance de diminuir a Accuracy do alvo em 1 estágio. | |
| Protect Machine | | — | — | 10 | Impede que Moves afetem o usuário neste turno. | |
| Rain Dance Machine | | — | — | 5 | Durante 5 turnos, uma forte chuva empodera Moves do tipo Water. | |
| Rest Level up Machine | | — | — | 5 | O usuário dorme por 2 turnos e restaura o seu HP e status. | |
| Rock Tomb Machine | | 60 | 95 | 15 | Tem 100% de chance de diminuir a Speed do alvo em 1 estágio. | |
| Round Machine | | 60 | 100 | 15 | O Power dobra se outros Pokémon tiverem usado Round neste turno. | |
| Sandstorm Machine | | — | — | 10 | Durante 5 turnos, cria uma tempestade de areia. Rock-types têm a Sp. Def aumentada em 1,5x. | |
| Scald Machine | | 80 | 100 | 15 | Tem 30% de chance de queimar o alvo. Descongela o alvo. | |
| Sleep Talk Machine | | — | — | 10 | O usuário deve estar dormindo. Usa outro Move conhecido. | |
| Snore Level up Machine | | 50 | 100 | 15 | O usuário deve estar dormindo. Tem 30% de chance de causar flinch. | |
| Spark Egg | | 65 | 100 | 20 | Tem 30% de chance de paralisar o alvo. | |
| Substitute Machine | | — | — | 10 | O usuário perde 1/4 de seu HP máximo para colocar um substitute. | |
| Surf Machine | | 90 | 100 | 15 | Atinge Pokémon adjacentes. Dano duplo em Dive. | |
| Take Down Egg | | 90 | 85 | 20 | Tem 1/4 de recoil. | |
| Thrash Egg | | 120 | 100 | 10 | Dura 2-3 turnos. Confunde o usuário depois. | |
| Waterfall Machine | | 80 | 100 | 15 | Tem 20% de chance de causar flinch. | |
| Water Gun Level up | | 40 | 100 | 25 | Nenhum efeito adicional. | |
| Water Pulse Level up | | 60 | 100 | 20 | Tem 20% de chance de confundir o alvo. | |
| Whirlpool Machine | | 35 | 85 | 15 | Prende o alvo e causa dano por 4-5 turnos. |

| Move | Tipo | Categoria | Power | PP | Descrição | |
|---|---|---|---|---|---|---|
| Amnesia Level up | | — | — | 20 | Aumenta a Sp. Def do usuário em 2 estágios. | |
| Aqua Tail Level up Tutor | | 90 | 90 | 10 | Nenhum efeito adicional. | |
| Attract Machine | | — | 100 | 15 | Um alvo do gênero oposto fica apaixonado. | |
| Blizzard Machine | | 110 | 70 | 5 | Tem 10% de chance de congelar os adversários. Não erra na neve. | |
| Bounce Tutor | | 85 | 85 | 5 | Salta no turno 1. Ataca no turno 2. Tem 30% de chance de paralisar. | |
| Bulldoze Machine | | 60 | 100 | 20 | Tem 100% de chance de reduzir a Speed de adversários em 1 estágio. | |
| Confide Machine | | — | — | 20 | Reduz o Sp. Atk do alvo em 1 estágio. | |
| Double Team Machine | | — | — | 15 | Aumenta a evasão do usuário em 1 estágio. | |
| Dragon Dance Egg | | — | — | 20 | Aumenta o Attack e a Speed do usuário em 1 estágio. | |
| Earth Power Egg Tutor | | 90 | 100 | 10 | Tem 10% de chance de diminuir a Sp. Def do alvo em 1 estágio. | |
| Earthquake Level up Machine | | 100 | 100 | 10 | Atinge Pokémon adjacentes. Causa o dobro de dano em Dig. | |
| Facade Machine | | 70 | 100 | 20 | O Power dobra se o usuário estiver com burn/poison/paralysis. | |
| Fissure Level up | | — | 30 | 5 | Derrota o alvo em OHKO. Falha se o usuário tiver um level inferior. | |
| Flail Egg | | — | 100 | 15 | Mais Power quanto menos HP o usuário tiver. | |
| Frustration Machine | | — | 100 | 20 | Se o usuário estiver com felicidade mínima, tem 102 de Power. | |
| Future Sight Level up | | 120 | 100 | 10 | Ataca por dois turnos após ser usado. | |
| Hail Machine | | — | — | 10 | Por 5 turnos, faz cair granizo. | |
| Hidden Power Machine | | 60 | 100 | 15 | O tipo deste Move varia com base nos IVs do usuário. | |
| Hydro Pump Egg | | 110 | 80 | 5 | Nenhum efeito adicional. | |
| Ice Beam Machine | | 90 | 100 | 10 | Tem 10% de chance de congelar o alvo. | |
| Icy Wind Tutor | | 55 | 95 | 15 | Tem 100% de chance de diminuir a Speed dos adversários em 1 estágio. | |
| Magnitude Level up | | — | 100 | 30 | Acerta os Pokémon adjacentes. O Power varia; 2x em Dig. | |
| Mud Bomb Level up | | 65 | 85 | 10 | Tem 30% de chance de diminuir a Accuracy do alvo em 1 estágio. | |
| Muddy Water Level up Egg | | 90 | 85 | 10 | Tem 30% de chance de diminuir a accuracy dos adversários em 1 estágio. | |
| Mud Shot Egg | | 55 | 95 | 15 | Tem 100% de chance de diminuir a Speed do alvo em 1 estágio. | |
| Mud-Slap Level up | | 20 | 100 | 10 | Tem 100% de chance de diminuir a Accuracy do alvo em 1 estágio. | |
| Mud Sport Level up | | — | — | 15 | Durante 5 turnos, Moves do tipo Electric têm 1/3 de Power. | |
| Protect Machine | | — | — | 10 | Impede que Moves afetem o usuário neste turno. | |
| Rain Dance Machine | | — | — | 5 | Durante 5 turnos, uma forte chuva empodera Moves do tipo Water. | |
| Rest Level up Machine | | — | — | 5 | O usuário dorme por 2 turnos e restaura o seu HP e status. | |
| Return Machine | | — | 100 | 20 | Se o usuário estiver com felicidade máxima, tem 102 de Power. | |
| Rock Tomb Machine | | 60 | 95 | 15 | Tem 100% de chance de diminuir a Speed do alvo em 1 estágio. | |
| Round Machine | | 60 | 100 | 15 | O Power dobra se outros Pokémon tiverem usado Round neste turno. | |
| Sandstorm Machine | | — | — | 10 | Durante 5 turnos, cria uma tempestade de areia. Rock-types têm a Sp. Def aumentada em 1,5x. | |
| Scald Machine | | 80 | 100 | 15 | Tem 30% de chance de queimar o alvo. Descongela o alvo. | |
| Sleep Talk Machine | | — | — | 10 | O usuário deve estar dormindo. Usa outro Move conhecido. | |
| Snore Level up Tutor | | 50 | 100 | 15 | O usuário deve estar dormindo. Tem 30% de chance de causar flinch. | |
| Spark Egg | | 65 | 100 | 20 | Tem 30% de chance de paralisar o alvo. | |
| Substitute Machine | | — | — | 10 | O usuário perde 1/4 de seu HP máximo para colocar um substitute. | |
| Surf Machine | | 90 | 100 | 15 | Atinge Pokémon adjacentes. Dano duplo em Dive. | |
| Swagger Machine | | — | 85 | 15 | Aumenta o Attack do alvo em 2 estágios e causa confusão. | |
| Take Down Egg | | 90 | 85 | 20 | Tem 1/4 de recoil. | |
| Thrash Egg | | 120 | 100 | 10 | Dura 2-3 turnos. Confunde o usuário depois. | |
| Toxic Machine | | — | 90 | 10 | Envenena gravemente o alvo. Poison-types não podem errar. | |
| Waterfall Machine | | 80 | 100 | 15 | Tem 20% de chance de causar flinch. | |
| Water Gun Level up | | 40 | 100 | 25 | Nenhum efeito adicional. | |
| Water Pulse Level up Tutor | | 60 | 100 | 20 | Tem 20% de chance de confundir o alvo. | |
| Water Sport Level up | | — | — | 15 | Por 5 turnos, moves do tipo Fire têm 1/3 de Power. | |
| Whirlpool Egg | | 35 | 85 | 15 | Prende o alvo e causa dano por 4-5 turnos. |

| Move | Tipo | Categoria | Power | PP | Descrição | |
|---|---|---|---|---|---|---|
| Amnesia Level up | | — | — | 20 | Aumenta a Sp. Def do usuário em 2 estágios. | |
| Aqua Tail Level up Tutor | | 90 | 90 | 10 | Nenhum efeito adicional. | |
| Attract Machine | | — | 100 | 15 | Um alvo do gênero oposto fica apaixonado. | |
| Blizzard Machine | | 110 | 70 | 5 | Tem 10% de chance de congelar os adversários. Não erra na neve. | |
| Bounce Tutor | | 85 | 85 | 5 | Salta no turno 1. Ataca no turno 2. Tem 30% de chance de paralisar. | |
| Bulldoze Machine | | 60 | 100 | 20 | Tem 100% de chance de reduzir a Speed de adversários em 1 estágio. | |
| Confide Machine | | — | — | 20 | Reduz o Sp. Atk do alvo em 1 estágio. | |
| Dive Machine | | 80 | 100 | 10 | Mergulha no turno 1, ataca turno 2. | |
| Double Team Machine | | — | — | 15 | Aumenta a evasão do usuário em 1 estágio. | |
| Dragon Dance Egg | | — | — | 20 | Aumenta o Attack e a Speed do usuário em 1 estágio. | |
| Earth Power Egg Tutor | | 90 | 100 | 10 | Tem 10% de chance de diminuir a Sp. Def do alvo em 1 estágio. | |
| Earthquake Level up Machine | | 100 | 100 | 10 | Atinge Pokémon adjacentes. Causa o dobro de dano em Dig. | |
| Facade Machine | | 70 | 100 | 20 | O Power dobra se o usuário estiver com burn/poison/paralysis. | |
| Fissure Level up | | — | 30 | 5 | Derrota o alvo em OHKO. Falha se o usuário tiver um level inferior. | |
| Flail Egg | | — | 100 | 15 | Mais Power quanto menos HP o usuário tiver. | |
| Frustration Machine | | — | 100 | 20 | Se o usuário estiver com felicidade mínima, tem 102 de Power. | |
| Future Sight Level up | | 120 | 100 | 10 | Ataca por dois turnos após ser usado. | |
| Hail Machine | | — | — | 10 | Por 5 turnos, faz cair granizo. | |
| Hidden Power Machine | | 60 | 100 | 15 | O tipo deste Move varia com base nos IVs do usuário. | |
| Hydro Pump Egg | | 110 | 80 | 5 | Nenhum efeito adicional. | |
| Ice Beam Machine | | 90 | 100 | 10 | Tem 10% de chance de congelar o alvo. | |
| Icy Wind Tutor | | 55 | 95 | 15 | Tem 100% de chance de diminuir a Speed dos adversários em 1 estágio. | |
| Magnitude Level up | | — | 100 | 30 | Acerta os Pokémon adjacentes. O Power varia; 2x em Dig. | |
| Mud Bomb Level up | | 65 | 85 | 10 | Tem 30% de chance de diminuir a Accuracy do alvo em 1 estágio. | |
| Muddy Water Level up Egg | | 90 | 85 | 10 | Tem 30% de chance de diminuir a accuracy dos adversários em 1 estágio. | |
| Mud Shot Egg | | 55 | 95 | 15 | Tem 100% de chance de diminuir a Speed do alvo em 1 estágio. | |
| Mud-Slap Level up | | 20 | 100 | 10 | Tem 100% de chance de diminuir a Accuracy do alvo em 1 estágio. | |
| Mud Sport Level up | | — | — | 15 | Durante 5 turnos, Moves do tipo Electric têm 1/3 de Power. | |
| Protect Machine | | — | — | 10 | Impede que Moves afetem o usuário neste turno. | |
| Rain Dance Machine | | — | — | 5 | Durante 5 turnos, uma forte chuva empodera Moves do tipo Water. | |
| Rest Level up Machine | | — | — | 5 | O usuário dorme por 2 turnos e restaura o seu HP e status. | |
| Return Machine | | — | 100 | 20 | Se o usuário estiver com felicidade máxima, tem 102 de Power. | |
| Rock Tomb Machine | | 60 | 95 | 15 | Tem 100% de chance de diminuir a Speed do alvo em 1 estágio. | |
| Round Machine | | 60 | 100 | 15 | O Power dobra se outros Pokémon tiverem usado Round neste turno. | |
| Sandstorm Machine | | — | — | 10 | Durante 5 turnos, cria uma tempestade de areia. Rock-types têm a Sp. Def aumentada em 1,5x. | |
| Scald Machine | | 80 | 100 | 15 | Tem 30% de chance de queimar o alvo. Descongela o alvo. | |
| Secret Power Machine | | 70 | 100 | 20 | O efeito varia conforme o terreno. Tem 30% de chance de paralisar. | |
| Sleep Talk Machine | | — | — | 10 | O usuário deve estar dormindo. Usa outro Move conhecido. | |
| Snore Level up Tutor | | 50 | 100 | 15 | O usuário deve estar dormindo. Tem 30% de chance de causar flinch. | |
| Spark Egg | | 65 | 100 | 20 | Tem 30% de chance de paralisar o alvo. | |
| Substitute Machine | | — | — | 10 | O usuário perde 1/4 de seu HP máximo para colocar um substitute. | |
| Surf Machine | | 90 | 100 | 15 | Atinge Pokémon adjacentes. Dano duplo em Dive. | |
| Swagger Machine | | — | 85 | 15 | Aumenta o Attack do alvo em 2 estágios e causa confusão. | |
| Take Down Egg | | 90 | 85 | 20 | Tem 1/4 de recoil. | |
| Thrash Egg | | 120 | 100 | 10 | Dura 2-3 turnos. Confunde o usuário depois. | |
| Toxic Machine | | — | 90 | 10 | Envenena gravemente o alvo. Poison-types não podem errar. | |
| Waterfall Machine | | 80 | 100 | 15 | Tem 20% de chance de causar flinch. | |
| Water Gun Level up | | 40 | 100 | 25 | Nenhum efeito adicional. | |
| Water Pulse Level up Tutor | | 60 | 100 | 20 | Tem 20% de chance de confundir o alvo. | |
| Water Sport Level up | | — | — | 15 | Por 5 turnos, moves do tipo Fire têm 1/3 de Power. | |
| Whirlpool Egg | | 35 | 85 | 15 | Prende o alvo e causa dano por 4-5 turnos. |
| Move | Tipo | Categoria | Power | PP | Descrição | |
|---|---|---|---|---|---|---|
| Amnesia Level up | | — | — | 20 | Aumenta a Sp. Def do usuário em 2 estágios. | |
| Aqua Tail Level up Tutor | | 90 | 90 | 10 | Nenhum efeito adicional. | |
| Attract Machine | | — | 100 | 15 | Um alvo do gênero oposto fica apaixonado. | |
| Blizzard Machine | | 110 | 70 | 5 | Tem 10% de chance de congelar os adversários. Não erra na neve. | |
| Bounce Tutor | | 85 | 85 | 5 | Salta no turno 1. Ataca no turno 2. Tem 30% de chance de paralisar. | |
| Bulldoze Machine | | 60 | 100 | 20 | Tem 100% de chance de reduzir a Speed de adversários em 1 estágio. | |
| Dive Machine | | 80 | 100 | 10 | Mergulha no turno 1, ataca turno 2. | |
| Double Team Machine | | — | — | 15 | Aumenta a evasão do usuário em 1 estágio. | |
| Dragon Dance Egg | | — | — | 20 | Aumenta o Attack e a Speed do usuário em 1 estágio. | |
| Earth Power Egg Tutor | | 90 | 100 | 10 | Tem 10% de chance de diminuir a Sp. Def do alvo em 1 estágio. | |
| Earthquake Level up Machine | | 100 | 100 | 10 | Atinge Pokémon adjacentes. Causa o dobro de dano em Dig. | |
| Facade Machine | | 70 | 100 | 20 | O Power dobra se o usuário estiver com burn/poison/paralysis. | |
| Fissure Level up | | — | 30 | 5 | Derrota o alvo em OHKO. Falha se o usuário tiver um level inferior. | |
| Flail Egg | | — | 100 | 15 | Mais Power quanto menos HP o usuário tiver. | |
| Frustration Machine | | — | 100 | 20 | Se o usuário estiver com felicidade mínima, tem 102 de Power. | |
| Future Sight Level up | | 120 | 100 | 10 | Ataca por dois turnos após ser usado. | |
| Hail Machine | | — | — | 10 | Por 5 turnos, faz cair granizo. | |
| Hidden Power Machine | | 60 | 100 | 15 | O tipo deste Move varia com base nos IVs do usuário. | |
| Hydro Pump Egg | | 110 | 80 | 5 | Nenhum efeito adicional. | |
| Ice Beam Machine | | 90 | 100 | 10 | Tem 10% de chance de congelar o alvo. | |
| Icy Wind Tutor | | 55 | 95 | 15 | Tem 100% de chance de diminuir a Speed dos adversários em 1 estágio. | |
| Magnitude Level up | | — | 100 | 30 | Acerta os Pokémon adjacentes. O Power varia; 2x em Dig. | |
| Mud Bomb Level up | | 65 | 85 | 10 | Tem 30% de chance de diminuir a Accuracy do alvo em 1 estágio. | |
| Muddy Water Egg | | 90 | 85 | 10 | Tem 30% de chance de diminuir a accuracy dos adversários em 1 estágio. | |
| Mud Shot Egg | | 55 | 95 | 15 | Tem 100% de chance de diminuir a Speed do alvo em 1 estágio. | |
| Mud-Slap Level up Dream World | | 20 | 100 | 10 | Tem 100% de chance de diminuir a Accuracy do alvo em 1 estágio. | |
| Mud Sport Level up | | — | — | 15 | Durante 5 turnos, Moves do tipo Electric têm 1/3 de Power. | |
| Protect Machine | | — | — | 10 | Impede que Moves afetem o usuário neste turno. | |
| Rain Dance Machine | | — | — | 5 | Durante 5 turnos, uma forte chuva empodera Moves do tipo Water. | |
| Rest Level up Machine | | — | — | 5 | O usuário dorme por 2 turnos e restaura o seu HP e status. | |
| Return Machine | | — | 100 | 20 | Se o usuário estiver com felicidade máxima, tem 102 de Power. | |
| Rock Tomb Machine | | 60 | 95 | 15 | Tem 100% de chance de diminuir a Speed do alvo em 1 estágio. | |
| Round Machine | | 60 | 100 | 15 | O Power dobra se outros Pokémon tiverem usado Round neste turno. | |
| Sandstorm Machine | | — | — | 10 | Durante 5 turnos, cria uma tempestade de areia. Rock-types têm a Sp. Def aumentada em 1,5x. | |
| Scald Machine | | 80 | 100 | 15 | Tem 30% de chance de queimar o alvo. Descongela o alvo. | |
| Sleep Talk Tutor Dream World | | — | — | 10 | O usuário deve estar dormindo. Usa outro Move conhecido. | |
| Snore Level up Tutor | | 50 | 100 | 15 | O usuário deve estar dormindo. Tem 30% de chance de causar flinch. | |
| Spark Egg Dream World | | 65 | 100 | 20 | Tem 30% de chance de paralisar o alvo. | |
| Substitute Machine | | — | — | 10 | O usuário perde 1/4 de seu HP máximo para colocar um substitute. | |
| Surf Machine | | 90 | 100 | 15 | Atinge Pokémon adjacentes. Dano duplo em Dive. | |
| Swagger Machine | | — | 85 | 15 | Aumenta o Attack do alvo em 2 estágios e causa confusão. | |
| Take Down Egg | | 90 | 85 | 20 | Tem 1/4 de recoil. | |
| Thrash Egg | | 120 | 100 | 10 | Dura 2-3 turnos. Confunde o usuário depois. | |
| Toxic Machine | | — | 90 | 10 | Envenena gravemente o alvo. Poison-types não podem errar. | |
| Waterfall Machine | | 80 | 100 | 15 | Tem 20% de chance de causar flinch. | |
| Water Gun Level up | | 40 | 100 | 25 | Nenhum efeito adicional. | |
| Water Pulse Level up | | 60 | 100 | 20 | Tem 20% de chance de confundir o alvo. | |
| Water Sport Level up | | — | — | 15 | Por 5 turnos, moves do tipo Fire têm 1/3 de Power. | |
| Whirlpool Egg | | 35 | 85 | 15 | Prende o alvo e causa dano por 4-5 turnos. |
| Move | Tipo | Categoria | Power | PP | Descrição | |
|---|---|---|---|---|---|---|
| Amnesia Level up | | — | — | 20 | Aumenta a Sp. Def do usuário em 2 estágios. | |
| Aqua Tail Level up Tutor | | 90 | 90 | 10 | Nenhum efeito adicional. | |
| Attract Machine | | — | 100 | 15 | Um alvo do gênero oposto fica apaixonado. | |
| Blizzard Machine | | 110 | 70 | 5 | Tem 10% de chance de congelar os adversários. Não erra na neve. | |
| Bounce Tutor | | 85 | 85 | 5 | Salta no turno 1. Ataca no turno 2. Tem 30% de chance de paralisar. | |
| Captivate Machine | | — | 100 | 20 | Reduz o Sp. Atk do(s) adversário(s) em 2 estágios se for(em) do gênero oposto. | |
| Dive Tutor | | 80 | 100 | 10 | Mergulha no turno 1, ataca turno 2. | |
| Double Team Machine | | — | — | 15 | Aumenta a evasão do usuário em 1 estágio. | |
| Dragon Dance Egg | | — | — | 20 | Aumenta o Attack e a Speed do usuário em 1 estágio. | |
| Earth Power Tutor | | 90 | 100 | 10 | Tem 10% de chance de diminuir a Sp. Def do alvo em 1 estágio. | |
| Earthquake Level up Machine | | 100 | 100 | 10 | Atinge Pokémon adjacentes. Causa o dobro de dano em Dig. | |
| Endure Machine | | — | — | 10 | O usuário sobrevive aos ataques neste turno com pelo menos 1 HP. | |
| Facade Machine | | 70 | 100 | 20 | O Power dobra se o usuário estiver com burn/poison/paralysis. | |
| Fissure Level up | | — | 30 | 5 | Derrota o alvo em OHKO. Falha se o usuário tiver um level inferior. | |
| Flail Egg | | — | 100 | 15 | Mais Power quanto menos HP o usuário tiver. | |
| Frustration Machine | | — | 100 | 20 | Se o usuário estiver com felicidade mínima, tem 102 de Power. | |
| Future Sight Level up | | 120 | 100 | 10 | Ataca por dois turnos após ser usado. | |
| Hail Machine | | — | — | 10 | Por 5 turnos, faz cair granizo. | |
| Headbutt Tutor | | 70 | 100 | 15 | Tem 30% de chance de causar flinch. | |
| Hidden Power Machine | | 60 | 100 | 15 | O tipo deste Move varia com base nos IVs do usuário. | |
| Hydro Pump Egg | | 110 | 80 | 5 | Nenhum efeito adicional. | |
| Ice Beam Machine | | 90 | 100 | 10 | Tem 10% de chance de congelar o alvo. | |
| Icy Wind Tutor | | 55 | 95 | 15 | Tem 100% de chance de diminuir a Speed dos adversários em 1 estágio. | |
| Magnitude Level up | | — | 100 | 30 | Acerta os Pokémon adjacentes. O Power varia; 2x em Dig. | |
| Mud Bomb Level up | | 65 | 85 | 10 | Tem 30% de chance de diminuir a Accuracy do alvo em 1 estágio. | |
| Mud-Slap Level up Tutor | | 20 | 100 | 10 | Tem 100% de chance de diminuir a Accuracy do alvo em 1 estágio. | |
| Mud Sport Level up | | — | — | 15 | Durante 5 turnos, Moves do tipo Electric têm 1/3 de Power. | |
| Natural Gift Machine | | — | 100 | 15 | O Power e tipo dependem da Berry do usuário. | |
| Protect Machine | | — | — | 10 | Impede que Moves afetem o usuário neste turno. | |
| Rain Dance Machine | | — | — | 5 | Durante 5 turnos, uma forte chuva empodera Moves do tipo Water. | |
| Rest Level up Machine | | — | — | 5 | O usuário dorme por 2 turnos e restaura o seu HP e status. | |
| Return Machine | | — | 100 | 20 | Se o usuário estiver com felicidade máxima, tem 102 de Power. | |
| Rock Tomb Machine | | 60 | 95 | 15 | Tem 100% de chance de diminuir a Speed do alvo em 1 estágio. | |
| Sandstorm Machine | | — | — | 10 | Durante 5 turnos, cria uma tempestade de areia. Rock-types têm a Sp. Def aumentada em 1,5x. | |
| Secret Power Machine | | 70 | 100 | 20 | O efeito varia conforme o terreno. Tem 30% de chance de paralisar. | |
| Sleep Talk Machine | | — | — | 10 | O usuário deve estar dormindo. Usa outro Move conhecido. | |
| Snore Level up Tutor | | 50 | 100 | 15 | O usuário deve estar dormindo. Tem 30% de chance de causar flinch. | |
| Spark Egg | | 65 | 100 | 20 | Tem 30% de chance de paralisar o alvo. | |
| Substitute Machine | | — | — | 10 | O usuário perde 1/4 de seu HP máximo para colocar um substitute. | |
| Surf Machine | | 90 | 100 | 15 | Atinge Pokémon adjacentes. Dano duplo em Dive. | |
| Swagger Machine | | — | 85 | 15 | Aumenta o Attack do alvo em 2 estágios e causa confusão. | |
| Take Down Egg | | 90 | 85 | 20 | Tem 1/4 de recoil. | |
| Thrash Egg | | 120 | 100 | 10 | Dura 2-3 turnos. Confunde o usuário depois. | |
| Toxic Machine | | — | 90 | 10 | Envenena gravemente o alvo. Poison-types não podem errar. | |
| Waterfall Machine | | 80 | 100 | 15 | Tem 20% de chance de causar flinch. | |
| Water Gun Level up | | 40 | 100 | 25 | Nenhum efeito adicional. | |
| Water Pulse Level up Machine | | 60 | 100 | 20 | Tem 20% de chance de confundir o alvo. | |
| Water Sport Level up | | — | — | 15 | Por 5 turnos, moves do tipo Fire têm 1/3 de Power. | |
| Whirlpool Machine Egg | | 35 | 85 | 15 | Prende o alvo e causa dano por 4-5 turnos. |
| Move | Tipo | Categoria | Power | PP | Descrição | |
|---|---|---|---|---|---|---|
| Amnesia Level up | | — | — | 20 | Aumenta a Sp. Def do usuário em 2 estágios. | |
| Attract Machine | | — | 100 | 15 | Um alvo do gênero oposto fica apaixonado. | |
| Blizzard Machine | | 110 | 70 | 5 | Tem 10% de chance de congelar os adversários. Não erra na neve. | |
| Dive Machine | | 80 | 100 | 10 | Mergulha no turno 1, ataca turno 2. | |
| Double-Edge Tutor | | 120 | 100 | 15 | Tem 33% de recoil. | |
| Double Team Machine | | — | — | 15 | Aumenta a evasão do usuário em 1 estágio. | |
| Earthquake Level up Machine | | 100 | 100 | 10 | Atinge Pokémon adjacentes. Causa o dobro de dano em Dig. | |
| Endure Tutor | | — | — | 10 | O usuário sobrevive aos ataques neste turno com pelo menos 1 HP. | |
| Facade Machine | | 70 | 100 | 20 | O Power dobra se o usuário estiver com burn/poison/paralysis. | |
| Fissure Level up | | — | 30 | 5 | Derrota o alvo em OHKO. Falha se o usuário tiver um level inferior. | |
| Frustration Machine | | — | 100 | 20 | Se o usuário estiver com felicidade mínima, tem 102 de Power. | |
| Future Sight Level up | | 120 | 100 | 10 | Ataca por dois turnos após ser usado. | |
| Hail Machine | | — | — | 10 | Por 5 turnos, faz cair granizo. | |
| Hidden Power Machine | | 60 | 100 | 15 | O tipo deste Move varia com base nos IVs do usuário. | |
| Ice Beam Machine | | 90 | 100 | 10 | Tem 10% de chance de congelar o alvo. | |
| Icy Wind Tutor | | 55 | 95 | 15 | Tem 100% de chance de diminuir a Speed dos adversários em 1 estágio. | |
| Magnitude Level up | | — | 100 | 30 | Acerta os Pokémon adjacentes. O Power varia; 2x em Dig. | |
| Mimic Tutor | | — | — | 10 | O último Move que o alvo usou substitui este. | |
| Mud-Slap Level up Tutor | | 20 | 100 | 10 | Tem 100% de chance de diminuir a Accuracy do alvo em 1 estágio. | |
| Mud Sport Level up | | — | — | 15 | Durante 5 turnos, Moves do tipo Electric têm 1/3 de Power. | |
| Protect Machine | | — | — | 10 | Impede que Moves afetem o usuário neste turno. | |
| Rain Dance Machine | | — | — | 5 | Durante 5 turnos, uma forte chuva empodera Moves do tipo Water. | |
| Rest Level up Machine | | — | — | 5 | O usuário dorme por 2 turnos e restaura o seu HP e status. | |
| Return Machine | | — | 100 | 20 | Se o usuário estiver com felicidade máxima, tem 102 de Power. | |
| Rock Tomb Machine | | 60 | 95 | 15 | Tem 100% de chance de diminuir a Speed do alvo em 1 estágio. | |
| Sandstorm Machine | | — | — | 10 | Durante 5 turnos, cria uma tempestade de areia. Rock-types têm a Sp. Def aumentada em 1,5x. | |
| Secret Power Machine | | 70 | 100 | 20 | O efeito varia conforme o terreno. Tem 30% de chance de paralisar. | |
| Sleep Talk Tutor | | — | — | 10 | O usuário deve estar dormindo. Usa outro Move conhecido. | |
| Snore Level up Tutor | | 50 | 100 | 15 | O usuário deve estar dormindo. Tem 30% de chance de causar flinch. | |
| Spark Egg | | 65 | 100 | 20 | Tem 30% de chance de paralisar o alvo. | |
| Substitute Tutor | | — | — | 10 | O usuário perde 1/4 de seu HP máximo para colocar um substitute. | |
| Surf Machine | | 90 | 100 | 15 | Atinge Pokémon adjacentes. Dano duplo em Dive. | |
| Swagger Tutor | | — | 85 | 15 | Aumenta o Attack do alvo em 2 estágios e causa confusão. | |
| Thrash Egg | | 120 | 100 | 10 | Dura 2-3 turnos. Confunde o usuário depois. | |
| Toxic Machine | | — | 90 | 10 | Envenena gravemente o alvo. Poison-types não podem errar. | |
| Waterfall Machine | | 80 | 100 | 15 | Tem 20% de chance de causar flinch. | |
| Water Gun Level up | | 40 | 100 | 25 | Nenhum efeito adicional. | |
| Water Pulse Machine | | 60 | 100 | 20 | Tem 20% de chance de confundir o alvo. | |
| Water Sport Level up | | — | — | 15 | Por 5 turnos, moves do tipo Fire têm 1/3 de Power. | |
| Whirlpool Egg | | 35 | 85 | 15 | Prende o alvo e causa dano por 4-5 turnos. |
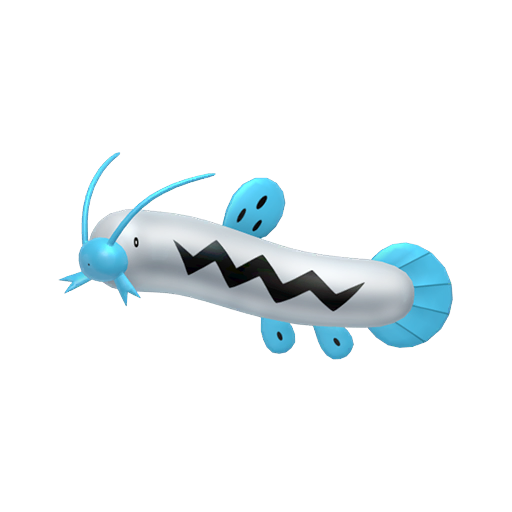
 Barboach
 Whiscash
Descrição In-game:
Legends: Arceus
Makes its home in swamps with murky water. The poor visibility hides this Pokémon from predators, and the slime on its body makes grasping it difficult.
Shield
It probes muddy riverbeds with its two long whiskers. A slimy film protects its body.
Exibir mais
Sword
Its slimy body is hard to grasp. In one region, it is said to have been born from hardened mud.
Ultra Moon
Its whiskers are filled with nerves. They can sense smells and flavors just as a person’s nose or tongue would.
Ultra Sun
Its entire body is gooey. When pecked at by bird Pokémon, it slips and slides its way to freedom.
Moon
Its slippery body is hard to grasp, so much so that there are festivals where people compete to see how many they can catch barehanded.
Sun
Its two whiskers provide a sensitive radar. Even in muddy waters, it can detect its prey’s location.
Alpha Sapphire
Barboach’s body is covered with a slimy film. If a foe grabs it, this Pokémon just slips out of the enemy’s grip. This Pokémon grows weak if the slimy coating dries up.
Omega Ruby
Barboach’s sensitive whiskers serve as a superb radar system. This Pokémon hides in mud, leaving only its two whiskers exposed while it waits for prey to come along.
Y
Its whiskers make a superb radar. They are used to locate prey, even in the murkiest of water.
X
It coats its entire body with a slimy fluid so it can squirm and slip away if grabbed.
White 2
Its slimy body is hard to grasp. In one region, it is said to have been born from hardened mud.
Black 2
Its slimy body is hard to grasp. In one region, it is said to have been born from hardened mud.
White
Its slimy body is hard to grasp. In one region, it is said to have been born from hardened mud.
Black
Its slimy body is hard to grasp. In one region, it is said to have been born from hardened mud.
SoulSilver
BARBOACH uses its whiskers to taste things just as a person uses his or her tongue to taste things.
HeartGold
BARBOACH uses its whiskers to taste things just as a person uses his or her tongue to taste things.
Platinum
Its slimy body is hard to grasp. In one region, it is said to have been born from hardened mud.
Pearl
Its whiskers make a superb radar. They are used to locate prey, even in the murkiest of water.
Diamond
It coats its entire body with a slimy fluid so it can squirm and slip away if grabbed.
LeafGreen
It probes muddy riverbeds with its two long whiskers. A slimy film protects its body.
FireRed
It probes muddy riverbeds with its two long whiskers. A slimy film protects its body.
Emerald
Its body is covered with a slimy film. The film acts as a barrier to prevent germs in muddy water from entering the BARBOACH’s body.
Sapphire
BARBOACH’s body is covered with a slimy film. If a foe grabs it, this POKéMON just slips out of the enemy’s
grip. This POKéMON grows weak if the slimy coating dries up.
Ruby
BARBOACH’s sensitive whiskers serve as a superb radar system. This POKéMON hides in mud, leaving only
its two whiskers exposed while it waits for prey to come along.
Locais de encontro
Ultra Moon
Paniola Town Area
Poni Gauntlet Area
Poni Meadow Area
Royal Avenue Area
Seaward Cave Area
Vast Poni Canyon Northwest
Paniola Town Area:
- Método: Fishing with a Super Rod
- 10% de chance
- Level 10 ~ Level 17
Poni Gauntlet Area:
- Método: Bubbling Spots
- 40% de chance
- Level 10 ~ Level 66
Poni Meadow Area:
- Método: Bubbling Spots
- 40% de chance
- Level 10 ~ Level 62
Royal Avenue Area:
- Método: NPC Troca
- 100% de chance
- Level 21
Seaward Cave Area:
- Método: Fishing with a Super Rod
- 10% de chance
- Level 10 ~ Level 17
Vast Poni Canyon Northwest:
- Método: Fishing with a Super Rod
- 25% de chance
- Level 10 ~ Level 46
Ultra Sun
Paniola Town Area
Poni Gauntlet Area
Poni Meadow Area
Royal Avenue Area
Seaward Cave Area
Vast Poni Canyon Northwest
Paniola Town Area:
- Método: Fishing with a Super Rod
- 10% de chance
- Level 10 ~ Level 17
Poni Gauntlet Area:
- Método: Bubbling Spots
- 40% de chance
- Level 10 ~ Level 66
Poni Meadow Area:
- Método: Bubbling Spots
- 40% de chance
- Level 10 ~ Level 62
Royal Avenue Area:
- Método: NPC Troca
- 100% de chance
- Level 21
Seaward Cave Area:
- Método: Fishing with a Super Rod
- 10% de chance
- Level 10 ~ Level 17
Vast Poni Canyon Northwest:
- Método: Fishing with a Super Rod
- 25% de chance
- Level 10 ~ Level 46
Exibir mais
Moon
Paniola Town Area
Poni Gauntlet Area
Poni Meadow Area
Seaward Cave Area
Vast Poni Canyon Northwest
Paniola Town Area:
- Método: Fishing with a Super Rod
- 1% de chance
- Level 10 ~ Level 18
Poni Gauntlet Area:
- Método: Bubbling Spots
- 40% de chance
- Level 10 ~ Level 59
Poni Meadow Area:
- Método: Bubbling Spots
- 40% de chance
- Level 10 ~ Level 57
Seaward Cave Area:
- Método: Fishing with a Super Rod
- 1% de chance
- Level 10 ~ Level 15
Vast Poni Canyon Northwest:
- Método: Bubbling Spots
- 40% de chance
- Level 10 ~ Level 44
Sun
Paniola Town Area
Poni Gauntlet Area
Poni Meadow Area
Seaward Cave Area
Vast Poni Canyon Northwest
Paniola Town Area:
- Método: Fishing with a Super Rod
- 1% de chance
- Level 10 ~ Level 18
Poni Gauntlet Area:
- Método: Bubbling Spots
- 40% de chance
- Level 10 ~ Level 59
Poni Meadow Area:
- Método: Bubbling Spots
- 40% de chance
- Level 10 ~ Level 57
Seaward Cave Area:
- Método: Fishing with a Super Rod
- 1% de chance
- Level 10 ~ Level 15
Vast Poni Canyon Northwest:
- Método: Bubbling Spots
- 40% de chance
- Level 10 ~ Level 44
Y
Road 14
Road 19
Road 14:
- Método: Fishing with a Good Rod
- 5% de chance
- Level 35
Road 19:
- Método: Fishing with a Good Rod
- 5% de chance
- Level 35
X
Road 14
Road 19
Road 14:
- Método: Fishing with a Good Rod
- 5% de chance
- Level 35
Road 19:
- Método: Fishing with a Good Rod
- 5% de chance
- Level 35
White 2
Icirrus City
Road 8
Moor of Icirrus
Icirrus City:
- Método: Fishing in dark spots
- 40% de chance
- Level 45 ~ Level 60
Road 8:
- Método: Fishing in dark spots
- 40% de chance
- Level 45 ~ Level 60
Moor of Icirrus:
- Método: Fishing in dark spots
- 40% de chance
- Level 45 ~ Level 60
Black 2
Icirrus City
Road 8
Moor of Icirrus
Icirrus City:
- Método: Fishing in dark spots
- 40% de chance
- Level 45 ~ Level 60
Road 8:
- Método: Fishing in dark spots
- 40% de chance
- Level 45 ~ Level 60
Moor of Icirrus:
- Método: Fishing in dark spots
- 40% de chance
- Level 45 ~ Level 60
White
Icirrus City
Road 8
Moor of Icirrus
Icirrus City:
- Método: Fishing in dark spots
- 40% de chance
- Level 35 ~ Level 60
Road 8:
- Método: Fishing in dark spots
- 40% de chance
- Level 35 ~ Level 60
Moor of Icirrus:
- Método: Fishing in dark spots
- 40% de chance
- Level 35 ~ Level 60
Black
Icirrus City
Road 8
Moor of Icirrus
Icirrus City:
- Método: Fishing in dark spots
- 40% de chance
- Level 35 ~ Level 60
Road 8:
- Método: Fishing in dark spots
- 40% de chance
- Level 35 ~ Level 60
Moor of Icirrus:
- Método: Fishing in dark spots
- 40% de chance
- Level 35 ~ Level 60
Platinum
Eterna City
Mount Coronet (1F Road 207)
Mount Coronet (4F)
Mount Coronet (B1F)
Great Marsh Area 1
Great Marsh Area 2
Great Marsh Area 3
Great Marsh Area 4
Great Marsh Area 5
Great Marsh Area 6
Ravaged Path
Oreburgh Gate (B1F)
Road 205 (east, towards Eterna City)
Road 210 (west, towards Celestic Town)
Road 225
Road 227
Road 228
Eterna City:
- Método: Fishing with a Good Rod
- 1% de chance
- Level 10 ~ Level 25
Mount Coronet (1F Road 207):
- Método: Fishing with a Good Rod
- 1% de chance
- Level 10 ~ Level 25
Mount Coronet (4F):
- Método: Fishing with a Good Rod
- 1% de chance
- Level 10 ~ Level 25
Mount Coronet (B1F):
- Método: Fishing with a Good Rod
- 1% de chance
- Level 10 ~ Level 25
Great Marsh Area 1:
- Método: Fishing with a Good Rod
- 1% de chance
- Level 10 ~ Level 25
Great Marsh Area 2:
- Método: Fishing with a Good Rod
- 1% de chance
- Level 10 ~ Level 25
Great Marsh Area 3:
- Método: Fishing with a Good Rod
- 1% de chance
- Level 10 ~ Level 25
Great Marsh Area 4:
- Método: Fishing with a Good Rod
- 1% de chance
- Level 10 ~ Level 25
Great Marsh Area 5:
- Método: Fishing with a Good Rod
- 1% de chance
- Level 10 ~ Level 25
Great Marsh Area 6:
- Método: Fishing with a Good Rod
- 1% de chance
- Level 10 ~ Level 25
Ravaged Path:
- Método: Fishing with a Good Rod
- 1% de chance
- Level 10 ~ Level 25
Oreburgh Gate (B1F):
- Método: Fishing with a Good Rod
- 1% de chance
- Level 10 ~ Level 25
Road 205 (east, towards Eterna City):
- Método: Fishing with a Good Rod
- 1% de chance
- Level 10 ~ Level 25
Road 210 (west, towards Celestic Town):
- Método: Fishing with a Good Rod
- 40% de chance
- Level 15 ~ Level 20
Road 225:
- Método: Fishing with a Good Rod
- 1% de chance
- Level 10 ~ Level 25
Road 227:
- Método: Fishing with a Good Rod
- 1% de chance
- Level 10 ~ Level 25
Road 228:
- Método: Fishing with a Good Rod
- 40% de chance
- Level 15 ~ Level 20
Pearl
Eterna City
Mount Coronet (1F Road 207)
Mount Coronet (4F)
Mount Coronet (B1F)
Great Marsh Area 1
Great Marsh Area 2
Great Marsh Area 3
Great Marsh Area 4
Great Marsh Area 6
Ravaged Path
Oreburgh Gate (B1F)
Road 205 (east, towards Eterna City)
Road 208
Road 210 (west, towards Celestic Town)
Road 212 (east, towards Pastoria City)
Road 227
Road 228
Celestic Town
Eterna City:
- Método: Fishing with a Good Rod
- 1% de chance
- Level 10 ~ Level 25
Mount Coronet (1F Road 207):
- Método: Fishing with a Good Rod
- 1% de chance
- Level 10 ~ Level 25
Mount Coronet (4F):
- Método: Fishing with a Good Rod
- 1% de chance
- Level 10 ~ Level 25
Mount Coronet (B1F):
- Método: Fishing with a Good Rod
- 1% de chance
- Level 10 ~ Level 25
Great Marsh Area 1:
- Método: Fishing with a Good Rod
- 40% de chance
- Level 15 ~ Level 20
Great Marsh Area 2:
- Método: Fishing with a Good Rod
- 40% de chance
- Level 15 ~ Level 20
Great Marsh Area 3:
- Método: Fishing with a Good Rod
- 40% de chance
- Level 15 ~ Level 20
Great Marsh Area 4:
- Método: Fishing with a Good Rod
- 40% de chance
- Level 15 ~ Level 20
Great Marsh Area 6:
- Método: Fishing with a Good Rod
- 40% de chance
- Level 15 ~ Level 20
Ravaged Path:
- Método: Fishing with a Good Rod
- 1% de chance
- Level 10 ~ Level 25
Oreburgh Gate (B1F):
- Método: Fishing with a Good Rod
- 1% de chance
- Level 10 ~ Level 25
Road 205 (east, towards Eterna City):
- Método: Fishing with a Good Rod
- 1% de chance
- Level 10 ~ Level 25
Road 208:
- Método: Fishing with a Good Rod
- 1% de chance
- Level 10 ~ Level 25
Road 210 (west, towards Celestic Town):
- Método: Fishing with a Good Rod
- 1% de chance
- Level 10 ~ Level 25
Road 212 (east, towards Pastoria City):
- Método: Fishing with a Good Rod
- 1% de chance
- Level 10 ~ Level 25
Road 227:
- Método: Fishing with a Good Rod
- 1% de chance
- Level 10 ~ Level 25
Road 228:
- Método: Fishing with a Good Rod
- 1% de chance
- Level 10 ~ Level 25
Celestic Town:
- Método: Fishing with a Good Rod
- 1% de chance
- Level 10 ~ Level 25
Diamond
Eterna City
Mount Coronet (1F Road 207)
Mount Coronet (4F)
Mount Coronet (B1F)
Great Marsh Area 1
Great Marsh Area 2
Great Marsh Area 3
Great Marsh Area 4
Great Marsh Area 6
Ravaged Path
Oreburgh Gate (B1F)
Road 205 (east, towards Eterna City)
Road 208
Road 210 (west, towards Celestic Town)
Road 212 (east, towards Pastoria City)
Road 227
Road 228
Celestic Town
Eterna City:
- Método: Fishing with a Good Rod
- 1% de chance
- Level 10 ~ Level 25
Mount Coronet (1F Road 207):
- Método: Fishing with a Good Rod
- 1% de chance
- Level 10 ~ Level 25
Mount Coronet (4F):
- Método: Fishing with a Good Rod
- 1% de chance
- Level 10 ~ Level 25
Mount Coronet (B1F):
- Método: Fishing with a Good Rod
- 1% de chance
- Level 10 ~ Level 25
Great Marsh Area 1:
- Método: Fishing with a Good Rod
- 40% de chance
- Level 15 ~ Level 20
Great Marsh Area 2:
- Método: Fishing with a Good Rod
- 40% de chance
- Level 15 ~ Level 20
Great Marsh Area 3:
- Método: Fishing with a Good Rod
- 40% de chance
- Level 15 ~ Level 20
Great Marsh Area 4:
- Método: Fishing with a Good Rod
- 40% de chance
- Level 15 ~ Level 20
Great Marsh Area 6:
- Método: Fishing with a Good Rod
- 40% de chance
- Level 15 ~ Level 20
Ravaged Path:
- Método: Fishing with a Good Rod
- 1% de chance
- Level 10 ~ Level 25
Oreburgh Gate (B1F):
- Método: Fishing with a Good Rod
- 1% de chance
- Level 10 ~ Level 25
Road 205 (east, towards Eterna City):
- Método: Fishing with a Good Rod
- 1% de chance
- Level 10 ~ Level 25
Road 208:
- Método: Fishing with a Good Rod
- 1% de chance
- Level 10 ~ Level 25
Road 210 (west, towards Celestic Town):
- Método: Fishing with a Good Rod
- 1% de chance
- Level 10 ~ Level 25
Road 212 (east, towards Pastoria City):
- Método: Fishing with a Good Rod
- 1% de chance
- Level 10 ~ Level 25
Road 227:
- Método: Fishing with a Good Rod
- 1% de chance
- Level 10 ~ Level 25
Road 228:
- Método: Fishing with a Good Rod
- 1% de chance
- Level 10 ~ Level 25
Celestic Town:
- Método: Fishing with a Good Rod
- 1% de chance
- Level 10 ~ Level 25
Emerald
Meteor Falls
Meteor Falls (back)
Meteor Falls (B1F)
Meteor Falls (back/small room)
Victory Road (B2F)
Road 111
Road 114
Road 120
Meteor Falls:
- Método: Fishing with a Super Rod
- 1% de chance
- Level 40 ~ Level 45
Meteor Falls (back):
- Método: Fishing with a Super Rod
- 40% de chance
- Level 30 ~ Level 35
Meteor Falls (B1F):
- Método: Fishing with a Super Rod
- 40% de chance
- Level 30 ~ Level 35
Meteor Falls (back/small room):
- Método: Fishing with a Super Rod
- 40% de chance
- Level 30 ~ Level 35
Victory Road (B2F):
- Método: Fishing with a Super Rod
- 40% de chance
- Level 30 ~ Level 35
Road 111:
- Método: Fishing with a Super Rod
- 1% de chance
- Level 40 ~ Level 45
Road 114:
- Método: Fishing with a Super Rod
- 1% de chance
- Level 40 ~ Level 45
Road 120:
- Método: Fishing with a Super Rod
- 1% de chance
- Level 40 ~ Level 45
Sapphire
Meteor Falls
Meteor Falls (back)
Meteor Falls (B1F)
Meteor Falls (back/small room)
Victory Road (B2F)
Road 111
Road 114
Road 120
Meteor Falls:
- Método: Fishing with a Super Rod
- 1% de chance
- Level 40 ~ Level 45
Meteor Falls (back):
- Método: Fishing with a Super Rod
- 40% de chance
- Level 30 ~ Level 35
Meteor Falls (B1F):
- Método: Fishing with a Super Rod
- 40% de chance
- Level 30 ~ Level 35
Meteor Falls (back/small room):
- Método: Fishing with a Super Rod
- 40% de chance
- Level 30 ~ Level 35
Victory Road (B2F):
- Método: Fishing with a Super Rod
- 40% de chance
- Level 30 ~ Level 35
Road 111:
- Método: Fishing with a Super Rod
- 1% de chance
- Level 40 ~ Level 45
Road 114:
- Método: Fishing with a Super Rod
- 1% de chance
- Level 40 ~ Level 45
Road 120:
- Método: Fishing with a Super Rod
- 1% de chance
- Level 40 ~ Level 45
Ruby
Meteor Falls
Meteor Falls (back)
Meteor Falls (B1F)
Meteor Falls (back/small room)
Victory Road (B2F)
Road 111
Road 114
Road 120
Meteor Falls:
- Método: Fishing with a Super Rod
- 1% de chance
- Level 40 ~ Level 45
Meteor Falls (back):
- Método: Fishing with a Super Rod
- 40% de chance
- Level 30 ~ Level 35
Meteor Falls (B1F):
- Método: Fishing with a Super Rod
- 40% de chance
- Level 30 ~ Level 35
Meteor Falls (back/small room):
- Método: Fishing with a Super Rod
- 40% de chance
- Level 30 ~ Level 35
Victory Road (B2F):
- Método: Fishing with a Super Rod
- 40% de chance
- Level 30 ~ Level 35
Road 111:
- Método: Fishing with a Super Rod
- 1% de chance
- Level 40 ~ Level 45
Road 114:
- Método: Fishing with a Super Rod
- 1% de chance
- Level 40 ~ Level 45
Road 120:
- Método: Fishing with a Super Rod
- 1% de chance
- Level 40 ~ Level 45
Moves que aprende
Gen IX
Gen VIII
Gen VII
Gen VI
Gen V
Gen IV
Gen III
Gen
Scarlet/Violet
| Level up | ||||||
|---|---|---|---|---|---|---|
| Move | Tipo | Categoria | Power | PP | Descrição | |
| Water Gun Level 1 | | 40 | 100 | 25 | Nenhum efeito adicional. | |
| Mud-Slap Level 1 | | 20 | 100 | 10 | Tem 100% de chance de diminuir a Accuracy do alvo em 1 estágio. | |
| Rest Level 6 | | — | — | 5 | O usuário dorme por 2 turnos e restaura o seu HP e status. | |
| Snore Level 6 | | 50 | 100 | 15 | O usuário deve estar dormindo. Tem 30% de chance de causar flinch. | |
| Water Pulse Level 12 | | 60 | 100 | 20 | Tem 20% de chance de confundir o alvo. | |
| Amnesia Level 18 | | — | — | 20 | Aumenta a Sp. Def do usuário em 2 estágios. | |
| Aqua Tail Level 24 | | 90 | 90 | 10 | Nenhum efeito adicional. | |
| Muddy Water Level 31 | | 90 | 85 | 10 | Tem 30% de chance de diminuir a accuracy dos adversários em 1 estágio. | |
| Earthquake Level 36 | | 100 | 100 | 10 | Atinge Pokémon adjacentes. Causa o dobro de dano em Dig. | |
| Future Sight Level 42 | | 120 | 100 | 10 | Ataca por dois turnos após ser usado. | |
| Fissure Level 48 | | — | 30 | 5 | Derrota o alvo em OHKO. Falha se o usuário tiver um level inferior. | |
| Machine | ||||||
|---|---|---|---|---|---|---|
| Move | Tipo | Categoria | Power | PP | Descrição | |
| Amnesia Machine | | — | — | 20 | Aumenta a Sp. Def do usuário em 2 estágios. | |
| Blizzard Machine | | 110 | 70 | 5 | Tem 10% de chance de congelar os adversários. Não erra na neve. | |
| Bulldoze Machine | | 60 | 100 | 20 | Tem 100% de chance de reduzir a Speed de adversários em 1 estágio. | |
| Chilling Water Machine | | 50 | 100 | 20 | Tem 100% de chance de diminuir o Attack do alvo em 1 estágio. | |
| Double-Edge Machine | | 120 | 100 | 15 | Tem 33% de recoil. | |
| Dragon Dance Machine | | — | — | 20 | Aumenta o Attack e a Speed do usuário em 1 estágio. | |
| Earth Power Machine | | 90 | 100 | 10 | Tem 10% de chance de diminuir a Sp. Def do alvo em 1 estágio. | |
| Earthquake Machine | | 100 | 100 | 10 | Atinge Pokémon adjacentes. Causa o dobro de dano em Dig. | |
| Endure Machine | | — | — | 10 | O usuário sobrevive aos ataques neste turno com pelo menos 1 HP. | |
| Facade Machine | | 70 | 100 | 20 | O Power dobra se o usuário estiver com burn/poison/paralysis. | |
| Future Sight Machine | | 120 | 100 | 10 | Ataca por dois turnos após ser usado. | |
| Helping Hand Machine | | — | — | 20 | O Power do Move de um aliado adjacente é 1,5x maior neste turno. | |
| High Horsepower Machine | | 95 | 95 | 10 | Nenhum efeito adicional. | |
| Hydro Pump Machine | | 110 | 80 | 5 | Nenhum efeito adicional. | |
| Ice Beam Machine | | 90 | 100 | 10 | Tem 10% de chance de congelar o alvo. | |
| Icy Wind Machine | | 55 | 95 | 15 | Tem 100% de chance de diminuir a Speed dos adversários em 1 estágio. | |
| Liquidation Machine | | 85 | 100 | 10 | Tem 20% de chance de diminuir a Defense do alvo em 1 estágio. | |
| Mud Shot Machine | | 55 | 95 | 15 | Tem 100% de chance de diminuir a Speed do alvo em 1 estágio. | |
| Mud-Slap Machine | | 20 | 100 | 10 | Tem 100% de chance de diminuir a Accuracy do alvo em 1 estágio. | |
| Muddy Water Machine | | 90 | 85 | 10 | Tem 30% de chance de diminuir a accuracy dos adversários em 1 estágio. | |
| Outrage Machine | | 120 | 100 | 10 | Dura 2-3 turnos. Confunde o usuário depois. | |
| Protect Machine | | — | — | 10 | Impede que Moves afetem o usuário neste turno. | |
| Rain Dance Machine | | — | — | 5 | Durante 5 turnos, uma forte chuva empodera Moves do tipo Water. | |
| Rest Machine | | — | — | 5 | O usuário dorme por 2 turnos e restaura o seu HP e status. | |
| Rock Slide Machine | | 75 | 90 | 10 | Tem 30% de chance de causar flinch. | |
| Rock Tomb Machine | | 60 | 95 | 15 | Tem 100% de chance de diminuir a Speed do alvo em 1 estágio. | |
| Sandstorm Machine | | — | — | 10 | Durante 5 turnos, cria uma tempestade de areia. Rock-types têm a Sp. Def aumentada em 1,5x. | |
| Sleep Talk Machine | | — | — | 10 | O usuário deve estar dormindo. Usa outro Move conhecido. | |
| Stealth Rock Machine | | — | — | 20 | Um hazard que causa dano nos adversário ao darem switch-in. O dano varia conforme a fraqueza dos adversários ao tipo Rock. | |
| Stomping Tantrum Machine | | 75 | 100 | 10 | O Power dobra se o último Move do usuário tiver falhado. | |
| Stone Edge Machine | | 100 | 80 | 5 | Tem altas chances de critical hit. | |
| Substitute Machine | | — | — | 10 | O usuário perde 1/4 de seu HP máximo para colocar um substitute. | |
| Sunny Day Machine | | — | — | 5 | Durante 5 turnos, uma intensa luz solar empodera Moves do tipo Fire. | |
| Surf Machine | | 90 | 100 | 15 | Atinge Pokémon adjacentes. Dano duplo em Dive. | |
| Swift Machine | | 60 | — | 20 | Este Move não verifica accuracy. Atinge adversários adjacentes. | |
| Take Down Machine | | 90 | 85 | 20 | Tem 1/4 de recoil. | |
| Tera Blast Machine | | 80 | 100 | 10 | Se o usuário estiver Terastalizado, o Move será físico se o seu Atk for maior que o Sp. Atk, e o tipo será igual ao Tera Type. | |
| Water Pulse Machine | | 60 | 100 | 20 | Tem 20% de chance de confundir o alvo. | |
| Waterfall Machine | | 80 | 100 | 15 | Tem 20% de chance de causar flinch. | |
| Whirlpool Machine | | 35 | 85 | 15 | Prende o alvo e causa dano por 4-5 turnos. | |
| Zen Headbutt Machine | | 80 | 90 | 15 | Tem 20% de chance de causar flinch. | |
| Egg | ||||||
|---|---|---|---|---|---|---|
| Move | Tipo | Categoria | Power | PP | Descrição | |
| Flail Egg | | — | 100 | 15 | Mais Power quanto menos HP o usuário tiver. | |
| Spark Egg | | 65 | 100 | 20 | Tem 30% de chance de paralisar o alvo. | |
| Take Down Egg | | 90 | 85 | 20 | Tem 1/4 de recoil. | |
| Thrash Egg | | 120 | 100 | 10 | Dura 2-3 turnos. Confunde o usuário depois. | |
| Level up | ||||||
|---|---|---|---|---|---|---|
| Move | Tipo | Categoria | Power | PP | Descrição | |
| Water Gun Level 1 | | 40 | 100 | 25 | Nenhum efeito adicional. | |
| Mud-Slap Level 1 | | 20 | 100 | 10 | Tem 100% de chance de diminuir a Accuracy do alvo em 1 estágio. | |
| Rest Level 6 | | — | — | 5 | O usuário dorme por 2 turnos e restaura o seu HP e status. | |
| Snore Level 6 | | 50 | 100 | 15 | O usuário deve estar dormindo. Tem 30% de chance de causar flinch. | |
| Water Pulse Level 12 | | 60 | 100 | 20 | Tem 20% de chance de confundir o alvo. | |
| Amnesia Level 18 | | — | — | 20 | Aumenta a Sp. Def do usuário em 2 estágios. | |
| Aqua Tail Level 24 | | 90 | 90 | 10 | Nenhum efeito adicional. | |
| Muddy Water Level 31 | | 90 | 85 | 10 | Tem 30% de chance de diminuir a accuracy dos adversários em 1 estágio. | |
| Earthquake Level 36 | | 100 | 100 | 10 | Atinge Pokémon adjacentes. Causa o dobro de dano em Dig. | |
| Future Sight Level 42 | | 120 | 100 | 10 | Ataca por dois turnos após ser usado. | |
| Fissure Level 48 | | — | 30 | 5 | Derrota o alvo em OHKO. Falha se o usuário tiver um level inferior. | |
| Machine | ||||||
|---|---|---|---|---|---|---|
| Move | Tipo | Categoria | Power | PP | Descrição | |
| Amnesia Machine | | — | — | 20 | Aumenta a Sp. Def do usuário em 2 estágios. | |
| Attract Machine | | — | 100 | 15 | Um alvo do gênero oposto fica apaixonado. | |
| Blizzard Machine | | 110 | 70 | 5 | Tem 10% de chance de congelar os adversários. Não erra na neve. | |
| Bounce Machine | | 85 | 85 | 5 | Salta no turno 1. Ataca no turno 2. Tem 30% de chance de paralisar. | |
| Bulldoze Machine | | 60 | 100 | 20 | Tem 100% de chance de reduzir a Speed de adversários em 1 estágio. | |
| Dive Machine | | 80 | 100 | 10 | Mergulha no turno 1, ataca turno 2. | |
| Dragon Dance Machine | | — | — | 20 | Aumenta o Attack e a Speed do usuário em 1 estágio. | |
| Earth Power Machine | | 90 | 100 | 10 | Tem 10% de chance de diminuir a Sp. Def do alvo em 1 estágio. | |
| Earthquake Machine | | 100 | 100 | 10 | Atinge Pokémon adjacentes. Causa o dobro de dano em Dig. | |
| Endure Machine | | — | — | 10 | O usuário sobrevive aos ataques neste turno com pelo menos 1 HP. | |
| Facade Machine | | 70 | 100 | 20 | O Power dobra se o usuário estiver com burn/poison/paralysis. | |
| Future Sight Machine | | 120 | 100 | 10 | Ataca por dois turnos após ser usado. | |
| Hail Machine | | — | — | 10 | Por 5 turnos, faz cair granizo. | |
| Hydro Pump Machine | | 110 | 80 | 5 | Nenhum efeito adicional. | |
| Ice Beam Machine | | 90 | 100 | 10 | Tem 10% de chance de congelar o alvo. | |
| Icy Wind Machine | | 55 | 95 | 15 | Tem 100% de chance de diminuir a Speed dos adversários em 1 estágio. | |
| Mud Shot Machine | | 55 | 95 | 15 | Tem 100% de chance de diminuir a Speed do alvo em 1 estágio. | |
| Muddy Water Machine | | 90 | 85 | 10 | Tem 30% de chance de diminuir a accuracy dos adversários em 1 estágio. | |
| Protect Machine | | — | — | 10 | Impede que Moves afetem o usuário neste turno. | |
| Rain Dance Machine | | — | — | 5 | Durante 5 turnos, uma forte chuva empodera Moves do tipo Water. | |
| Rest Machine | | — | — | 5 | O usuário dorme por 2 turnos e restaura o seu HP e status. | |
| Rock Tomb Machine | | 60 | 95 | 15 | Tem 100% de chance de diminuir a Speed do alvo em 1 estágio. | |
| Round Machine | | 60 | 100 | 15 | O Power dobra se outros Pokémon tiverem usado Round neste turno. | |
| Sandstorm Machine | | — | — | 10 | Durante 5 turnos, cria uma tempestade de areia. Rock-types têm a Sp. Def aumentada em 1,5x. | |
| Scald Machine | | 80 | 100 | 15 | Tem 30% de chance de queimar o alvo. Descongela o alvo. | |
| Sleep Talk Machine | | — | — | 10 | O usuário deve estar dormindo. Usa outro Move conhecido. | |
| Snore Machine | | 50 | 100 | 15 | O usuário deve estar dormindo. Tem 30% de chance de causar flinch. | |
| Substitute Machine | | — | — | 10 | O usuário perde 1/4 de seu HP máximo para colocar um substitute. | |
| Surf Machine | | 90 | 100 | 15 | Atinge Pokémon adjacentes. Dano duplo em Dive. | |
| Waterfall Machine | | 80 | 100 | 15 | Tem 20% de chance de causar flinch. | |
| Whirlpool Machine | | 35 | 85 | 15 | Prende o alvo e causa dano por 4-5 turnos. | |
| Egg | ||||||
|---|---|---|---|---|---|---|
| Move | Tipo | Categoria | Power | PP | Descrição | |
| Flail Egg | | — | 100 | 15 | Mais Power quanto menos HP o usuário tiver. | |
| Spark Egg | | 65 | 100 | 20 | Tem 30% de chance de paralisar o alvo. | |
| Take Down Egg | | 90 | 85 | 20 | Tem 1/4 de recoil. | |
| Thrash Egg | | 120 | 100 | 10 | Dura 2-3 turnos. Confunde o usuário depois. | |
| Level up | ||||||
|---|---|---|---|---|---|---|
| Move | Tipo | Categoria | Power | PP | Descrição | |
| Mud-Slap Level 1 | | 20 | 100 | 10 | Tem 100% de chance de diminuir a Accuracy do alvo em 1 estágio. | |
| Water Pulse Level 6 | | 60 | 100 | 20 | Tem 20% de chance de confundir o alvo. | |
| Mud Bomb Level 11 | | 65 | 85 | 10 | Tem 30% de chance de diminuir a Accuracy do alvo em 1 estágio. | |
| Rest Level 18 | | — | — | 5 | O usuário dorme por 2 turnos e restaura o seu HP e status. | |
| Zen Headbutt Level 25 | | 80 | 90 | 15 | Tem 20% de chance de causar flinch. | |
| Aqua Tail Level 34 | | 90 | 90 | 10 | Nenhum efeito adicional. | |
| Earth Power Level 43 | | 90 | 100 | 10 | Tem 10% de chance de diminuir a Sp. Def do alvo em 1 estágio. | |
| Level up | ||||||
|---|---|---|---|---|---|---|
| Move | Tipo | Categoria | Power | PP | Descrição | |
| Mud-Slap Level 1 | | 20 | 100 | 10 | Tem 100% de chance de diminuir a Accuracy do alvo em 1 estágio. | |
| Mud Sport Level 6 | | — | — | 15 | Durante 5 turnos, Moves do tipo Electric têm 1/3 de Power. | |
| Water Sport Level 6 | | — | — | 15 | Por 5 turnos, moves do tipo Fire têm 1/3 de Power. | |
| Water Gun Level 9 | | 40 | 100 | 25 | Nenhum efeito adicional. | |
| Mud Bomb Level 13 | | 65 | 85 | 10 | Tem 30% de chance de diminuir a Accuracy do alvo em 1 estágio. | |
| Amnesia Level 15 | | — | — | 20 | Aumenta a Sp. Def do usuário em 2 estágios. | |
| Water Pulse Level 17 | | 60 | 100 | 20 | Tem 20% de chance de confundir o alvo. | |
| Magnitude Level 20 | | — | 100 | 30 | Acerta os Pokémon adjacentes. O Power varia; 2x em Dig. | |
| Rest Level 25 | | — | — | 5 | O usuário dorme por 2 turnos e restaura o seu HP e status. | |
| Snore Level 25 | | 50 | 100 | 15 | O usuário deve estar dormindo. Tem 30% de chance de causar flinch. | |
| Aqua Tail Level 28 | | 90 | 90 | 10 | Nenhum efeito adicional. | |
| Earthquake Level 32 | | 100 | 100 | 10 | Atinge Pokémon adjacentes. Causa o dobro de dano em Dig. | |
| Muddy Water Level 35 | | 90 | 85 | 10 | Tem 30% de chance de diminuir a accuracy dos adversários em 1 estágio. | |
| Future Sight Level 39 | | 120 | 100 | 10 | Ataca por dois turnos após ser usado. | |
| Fissure Level 44 | | — | 30 | 5 | Derrota o alvo em OHKO. Falha se o usuário tiver um level inferior. | |
| Machine | ||||||
|---|---|---|---|---|---|---|
| Move | Tipo | Categoria | Power | PP | Descrição | |
| Attract Machine | | — | 100 | 15 | Um alvo do gênero oposto fica apaixonado. | |
| Blizzard Machine | | 110 | 70 | 5 | Tem 10% de chance de congelar os adversários. Não erra na neve. | |
| Bulldoze Machine | | 60 | 100 | 20 | Tem 100% de chance de reduzir a Speed de adversários em 1 estágio. | |
| Confide Machine | | — | — | 20 | Reduz o Sp. Atk do alvo em 1 estágio. | |
| Double Team Machine | | — | — | 15 | Aumenta a evasão do usuário em 1 estágio. | |
| Earthquake Machine | | 100 | 100 | 10 | Atinge Pokémon adjacentes. Causa o dobro de dano em Dig. | |
| Facade Machine | | 70 | 100 | 20 | O Power dobra se o usuário estiver com burn/poison/paralysis. | |
| Frustration Machine | | — | 100 | 20 | Se o usuário estiver com felicidade mínima, tem 102 de Power. | |
| Hail Machine | | — | — | 10 | Por 5 turnos, faz cair granizo. | |
| Hidden Power Machine | | 60 | 100 | 15 | O tipo deste Move varia com base nos IVs do usuário. | |
| Ice Beam Machine | | 90 | 100 | 10 | Tem 10% de chance de congelar o alvo. | |
| Protect Machine | | — | — | 10 | Impede que Moves afetem o usuário neste turno. | |
| Rain Dance Machine | | — | — | 5 | Durante 5 turnos, uma forte chuva empodera Moves do tipo Water. | |
| Rest Machine | | — | — | 5 | O usuário dorme por 2 turnos e restaura o seu HP e status. | |
| Return Machine | | — | 100 | 20 | Se o usuário estiver com felicidade máxima, tem 102 de Power. | |
| Rock Tomb Machine | | 60 | 95 | 15 | Tem 100% de chance de diminuir a Speed do alvo em 1 estágio. | |
| Round Machine | | 60 | 100 | 15 | O Power dobra se outros Pokémon tiverem usado Round neste turno. | |
| Sandstorm Machine | | — | — | 10 | Durante 5 turnos, cria uma tempestade de areia. Rock-types têm a Sp. Def aumentada em 1,5x. | |
| Scald Machine | | 80 | 100 | 15 | Tem 30% de chance de queimar o alvo. Descongela o alvo. | |
| Sleep Talk Machine | | — | — | 10 | O usuário deve estar dormindo. Usa outro Move conhecido. | |
| Substitute Machine | | — | — | 10 | O usuário perde 1/4 de seu HP máximo para colocar um substitute. | |
| Surf Machine | | 90 | 100 | 15 | Atinge Pokémon adjacentes. Dano duplo em Dive. | |
| Swagger Machine | | — | 85 | 15 | Aumenta o Attack do alvo em 2 estágios e causa confusão. | |
| Toxic Machine | | — | 90 | 10 | Envenena gravemente o alvo. Poison-types não podem errar. | |
| Waterfall Machine | | 80 | 100 | 15 | Tem 20% de chance de causar flinch. | |
| Egg | ||||||
|---|---|---|---|---|---|---|
| Move | Tipo | Categoria | Power | PP | Descrição | |
| Dragon Dance Egg | | — | — | 20 | Aumenta o Attack e a Speed do usuário em 1 estágio. | |
| Earth Power Egg | | 90 | 100 | 10 | Tem 10% de chance de diminuir a Sp. Def do alvo em 1 estágio. | |
| Flail Egg | | — | 100 | 15 | Mais Power quanto menos HP o usuário tiver. | |
| Hydro Pump Egg | | 110 | 80 | 5 | Nenhum efeito adicional. | |
| Mud Shot Egg | | 55 | 95 | 15 | Tem 100% de chance de diminuir a Speed do alvo em 1 estágio. | |
| Muddy Water Egg | | 90 | 85 | 10 | Tem 30% de chance de diminuir a accuracy dos adversários em 1 estágio. | |
| Spark Egg | | 65 | 100 | 20 | Tem 30% de chance de paralisar o alvo. | |
| Take Down Egg | | 90 | 85 | 20 | Tem 1/4 de recoil. | |
| Thrash Egg | | 120 | 100 | 10 | Dura 2-3 turnos. Confunde o usuário depois. | |
| Whirlpool Egg | | 35 | 85 | 15 | Prende o alvo e causa dano por 4-5 turnos. | |
| Level up | ||||||
|---|---|---|---|---|---|---|
| Move | Tipo | Categoria | Power | PP | Descrição | |
| Mud-Slap Level 1 | | 20 | 100 | 10 | Tem 100% de chance de diminuir a Accuracy do alvo em 1 estágio. | |
| Mud Sport Level 6 | | — | — | 15 | Durante 5 turnos, Moves do tipo Electric têm 1/3 de Power. | |
| Water Sport Level 6 | | — | — | 15 | Por 5 turnos, moves do tipo Fire têm 1/3 de Power. | |
| Water Gun Level 9 | | 40 | 100 | 25 | Nenhum efeito adicional. | |
| Mud Bomb Level 13 | | 65 | 85 | 10 | Tem 30% de chance de diminuir a Accuracy do alvo em 1 estágio. | |
| Amnesia Level 15 | | — | — | 20 | Aumenta a Sp. Def do usuário em 2 estágios. | |
| Water Pulse Level 17 | | 60 | 100 | 20 | Tem 20% de chance de confundir o alvo. | |
| Magnitude Level 20 | | — | 100 | 30 | Acerta os Pokémon adjacentes. O Power varia; 2x em Dig. | |
| Rest Level 25 | | — | — | 5 | O usuário dorme por 2 turnos e restaura o seu HP e status. | |
| Snore Level 25 | | 50 | 100 | 15 | O usuário deve estar dormindo. Tem 30% de chance de causar flinch. | |
| Aqua Tail Level 28 | | 90 | 90 | 10 | Nenhum efeito adicional. | |
| Earthquake Level 32 | | 100 | 100 | 10 | Atinge Pokémon adjacentes. Causa o dobro de dano em Dig. | |
| Muddy Water Level 35 | | 90 | 85 | 10 | Tem 30% de chance de diminuir a accuracy dos adversários em 1 estágio. | |
| Future Sight Level 39 | | 120 | 100 | 10 | Ataca por dois turnos após ser usado. | |
| Fissure Level 44 | | — | 30 | 5 | Derrota o alvo em OHKO. Falha se o usuário tiver um level inferior. | |
| Machine | ||||||
|---|---|---|---|---|---|---|
| Move | Tipo | Categoria | Power | PP | Descrição | |
| Attract Machine | | — | 100 | 15 | Um alvo do gênero oposto fica apaixonado. | |
| Blizzard Machine | | 110 | 70 | 5 | Tem 10% de chance de congelar os adversários. Não erra na neve. | |
| Bulldoze Machine | | 60 | 100 | 20 | Tem 100% de chance de reduzir a Speed de adversários em 1 estágio. | |
| Confide Machine | | — | — | 20 | Reduz o Sp. Atk do alvo em 1 estágio. | |
| Double Team Machine | | — | — | 15 | Aumenta a evasão do usuário em 1 estágio. | |
| Earthquake Machine | | 100 | 100 | 10 | Atinge Pokémon adjacentes. Causa o dobro de dano em Dig. | |
| Facade Machine | | 70 | 100 | 20 | O Power dobra se o usuário estiver com burn/poison/paralysis. | |
| Frustration Machine | | — | 100 | 20 | Se o usuário estiver com felicidade mínima, tem 102 de Power. | |
| Hail Machine | | — | — | 10 | Por 5 turnos, faz cair granizo. | |
| Hidden Power Machine | | 60 | 100 | 15 | O tipo deste Move varia com base nos IVs do usuário. | |
| Ice Beam Machine | | 90 | 100 | 10 | Tem 10% de chance de congelar o alvo. | |
| Protect Machine | | — | — | 10 | Impede que Moves afetem o usuário neste turno. | |
| Rain Dance Machine | | — | — | 5 | Durante 5 turnos, uma forte chuva empodera Moves do tipo Water. | |
| Rest Machine | | — | — | 5 | O usuário dorme por 2 turnos e restaura o seu HP e status. | |
| Return Machine | | — | 100 | 20 | Se o usuário estiver com felicidade máxima, tem 102 de Power. | |
| Rock Tomb Machine | | 60 | 95 | 15 | Tem 100% de chance de diminuir a Speed do alvo em 1 estágio. | |
| Round Machine | | 60 | 100 | 15 | O Power dobra se outros Pokémon tiverem usado Round neste turno. | |
| Sandstorm Machine | | — | — | 10 | Durante 5 turnos, cria uma tempestade de areia. Rock-types têm a Sp. Def aumentada em 1,5x. | |
| Scald Machine | | 80 | 100 | 15 | Tem 30% de chance de queimar o alvo. Descongela o alvo. | |
| Sleep Talk Machine | | — | — | 10 | O usuário deve estar dormindo. Usa outro Move conhecido. | |
| Substitute Machine | | — | — | 10 | O usuário perde 1/4 de seu HP máximo para colocar um substitute. | |
| Surf Machine | | 90 | 100 | 15 | Atinge Pokémon adjacentes. Dano duplo em Dive. | |
| Swagger Machine | | — | 85 | 15 | Aumenta o Attack do alvo em 2 estágios e causa confusão. | |
| Toxic Machine | | — | 90 | 10 | Envenena gravemente o alvo. Poison-types não podem errar. | |
| Waterfall Machine | | 80 | 100 | 15 | Tem 20% de chance de causar flinch. | |
| Tutor | ||||||
|---|---|---|---|---|---|---|
| Move | Tipo | Categoria | Power | PP | Descrição | |
| Aqua Tail Tutor | | 90 | 90 | 10 | Nenhum efeito adicional. | |
| Bounce Tutor | | 85 | 85 | 5 | Salta no turno 1. Ataca no turno 2. Tem 30% de chance de paralisar. | |
| Earth Power Tutor | | 90 | 100 | 10 | Tem 10% de chance de diminuir a Sp. Def do alvo em 1 estágio. | |
| Icy Wind Tutor | | 55 | 95 | 15 | Tem 100% de chance de diminuir a Speed dos adversários em 1 estágio. | |
| Snore Tutor | | 50 | 100 | 15 | O usuário deve estar dormindo. Tem 30% de chance de causar flinch. | |
| Water Pulse Tutor | | 60 | 100 | 20 | Tem 20% de chance de confundir o alvo. | |
| Egg | ||||||
|---|---|---|---|---|---|---|
| Move | Tipo | Categoria | Power | PP | Descrição | |
| Dragon Dance Egg | | — | — | 20 | Aumenta o Attack e a Speed do usuário em 1 estágio. | |
| Earth Power Egg | | 90 | 100 | 10 | Tem 10% de chance de diminuir a Sp. Def do alvo em 1 estágio. | |
| Flail Egg | | — | 100 | 15 | Mais Power quanto menos HP o usuário tiver. | |
| Hydro Pump Egg | | 110 | 80 | 5 | Nenhum efeito adicional. | |
| Mud Shot Egg | | 55 | 95 | 15 | Tem 100% de chance de diminuir a Speed do alvo em 1 estágio. | |
| Muddy Water Egg | | 90 | 85 | 10 | Tem 30% de chance de diminuir a accuracy dos adversários em 1 estágio. | |
| Spark Egg | | 65 | 100 | 20 | Tem 30% de chance de paralisar o alvo. | |
| Take Down Egg | | 90 | 85 | 20 | Tem 1/4 de recoil. | |
| Thrash Egg | | 120 | 100 | 10 | Dura 2-3 turnos. Confunde o usuário depois. | |
| Whirlpool Egg | | 35 | 85 | 15 | Prende o alvo e causa dano por 4-5 turnos. | |
| Level up | ||||||
|---|---|---|---|---|---|---|
| Move | Tipo | Categoria | Power | PP | Descrição | |
| Mud-Slap Level 1 | | 20 | 100 | 10 | Tem 100% de chance de diminuir a Accuracy do alvo em 1 estágio. | |
| Mud Sport Level 6 | | — | — | 15 | Durante 5 turnos, Moves do tipo Electric têm 1/3 de Power. | |
| Water Sport Level 6 | | — | — | 15 | Por 5 turnos, moves do tipo Fire têm 1/3 de Power. | |
| Water Gun Level 10 | | 40 | 100 | 25 | Nenhum efeito adicional. | |
| Mud Bomb Level 14 | | 65 | 85 | 10 | Tem 30% de chance de diminuir a Accuracy do alvo em 1 estágio. | |
| Amnesia Level 18 | | — | — | 20 | Aumenta a Sp. Def do usuário em 2 estágios. | |
| Water Pulse Level 22 | | 60 | 100 | 20 | Tem 20% de chance de confundir o alvo. | |
| Magnitude Level 26 | | — | 100 | 30 | Acerta os Pokémon adjacentes. O Power varia; 2x em Dig. | |
| Rest Level 31 | | — | — | 5 | O usuário dorme por 2 turnos e restaura o seu HP e status. | |
| Snore Level 31 | | 50 | 100 | 15 | O usuário deve estar dormindo. Tem 30% de chance de causar flinch. | |
| Aqua Tail Level 35 | | 90 | 90 | 10 | Nenhum efeito adicional. | |
| Earthquake Level 39 | | 100 | 100 | 10 | Atinge Pokémon adjacentes. Causa o dobro de dano em Dig. | |
| Future Sight Level 43 | | 120 | 100 | 10 | Ataca por dois turnos após ser usado. | |
| Fissure Level 47 | | — | 30 | 5 | Derrota o alvo em OHKO. Falha se o usuário tiver um level inferior. | |
| Machine | ||||||
|---|---|---|---|---|---|---|
| Move | Tipo | Categoria | Power | PP | Descrição | |
| Attract Machine | | — | 100 | 15 | Um alvo do gênero oposto fica apaixonado. | |
| Blizzard Machine | | 110 | 70 | 5 | Tem 10% de chance de congelar os adversários. Não erra na neve. | |
| Bulldoze Machine | | 60 | 100 | 20 | Tem 100% de chance de reduzir a Speed de adversários em 1 estágio. | |
| Confide Machine | | — | — | 20 | Reduz o Sp. Atk do alvo em 1 estágio. | |
| Double Team Machine | | — | — | 15 | Aumenta a evasão do usuário em 1 estágio. | |
| Earthquake Machine | | 100 | 100 | 10 | Atinge Pokémon adjacentes. Causa o dobro de dano em Dig. | |
| Facade Machine | | 70 | 100 | 20 | O Power dobra se o usuário estiver com burn/poison/paralysis. | |
| Frustration Machine | | — | 100 | 20 | Se o usuário estiver com felicidade mínima, tem 102 de Power. | |
| Hail Machine | | — | — | 10 | Por 5 turnos, faz cair granizo. | |
| Hidden Power Machine | | 60 | 100 | 15 | O tipo deste Move varia com base nos IVs do usuário. | |
| Ice Beam Machine | | 90 | 100 | 10 | Tem 10% de chance de congelar o alvo. | |
| Protect Machine | | — | — | 10 | Impede que Moves afetem o usuário neste turno. | |
| Rain Dance Machine | | — | — | 5 | Durante 5 turnos, uma forte chuva empodera Moves do tipo Water. | |
| Rest Machine | | — | — | 5 | O usuário dorme por 2 turnos e restaura o seu HP e status. | |
| Return Machine | | — | 100 | 20 | Se o usuário estiver com felicidade máxima, tem 102 de Power. | |
| Rock Tomb Machine | | 60 | 95 | 15 | Tem 100% de chance de diminuir a Speed do alvo em 1 estágio. | |
| Round Machine | | 60 | 100 | 15 | O Power dobra se outros Pokémon tiverem usado Round neste turno. | |
| Sandstorm Machine | | — | — | 10 | Durante 5 turnos, cria uma tempestade de areia. Rock-types têm a Sp. Def aumentada em 1,5x. | |
| Scald Machine | | 80 | 100 | 15 | Tem 30% de chance de queimar o alvo. Descongela o alvo. | |
| Sleep Talk Machine | | — | — | 10 | O usuário deve estar dormindo. Usa outro Move conhecido. | |
| Substitute Machine | | — | — | 10 | O usuário perde 1/4 de seu HP máximo para colocar um substitute. | |
| Surf Machine | | 90 | 100 | 15 | Atinge Pokémon adjacentes. Dano duplo em Dive. | |
| Swagger Machine | | — | 85 | 15 | Aumenta o Attack do alvo em 2 estágios e causa confusão. | |
| Toxic Machine | | — | 90 | 10 | Envenena gravemente o alvo. Poison-types não podem errar. | |
| Waterfall Machine | | 80 | 100 | 15 | Tem 20% de chance de causar flinch. | |
| Egg | ||||||
|---|---|---|---|---|---|---|
| Move | Tipo | Categoria | Power | PP | Descrição | |
| Dragon Dance Egg | | — | — | 20 | Aumenta o Attack e a Speed do usuário em 1 estágio. | |
| Earth Power Egg | | 90 | 100 | 10 | Tem 10% de chance de diminuir a Sp. Def do alvo em 1 estágio. | |
| Flail Egg | | — | 100 | 15 | Mais Power quanto menos HP o usuário tiver. | |
| Hydro Pump Egg | | 110 | 80 | 5 | Nenhum efeito adicional. | |
| Mud Shot Egg | | 55 | 95 | 15 | Tem 100% de chance de diminuir a Speed do alvo em 1 estágio. | |
| Muddy Water Egg | | 90 | 85 | 10 | Tem 30% de chance de diminuir a accuracy dos adversários em 1 estágio. | |
| Spark Egg | | 65 | 100 | 20 | Tem 30% de chance de paralisar o alvo. | |
| Take Down Egg | | 90 | 85 | 20 | Tem 1/4 de recoil. | |
| Thrash Egg | | 120 | 100 | 10 | Dura 2-3 turnos. Confunde o usuário depois. | |
| Whirlpool Egg | | 35 | 85 | 15 | Prende o alvo e causa dano por 4-5 turnos. | |
| Level up | ||||||
|---|---|---|---|---|---|---|
| Move | Tipo | Categoria | Power | PP | Descrição | |
| Mud-Slap Level 1 | | 20 | 100 | 10 | Tem 100% de chance de diminuir a Accuracy do alvo em 1 estágio. | |
| Mud Sport Level 6 | | — | — | 15 | Durante 5 turnos, Moves do tipo Electric têm 1/3 de Power. | |
| Water Sport Level 6 | | — | — | 15 | Por 5 turnos, moves do tipo Fire têm 1/3 de Power. | |
| Water Gun Level 9 | | 40 | 100 | 25 | Nenhum efeito adicional. | |
| Mud Bomb Level 13 | | 65 | 85 | 10 | Tem 30% de chance de diminuir a Accuracy do alvo em 1 estágio. | |
| Amnesia Level 15 | | — | — | 20 | Aumenta a Sp. Def do usuário em 2 estágios. | |
| Water Pulse Level 17 | | 60 | 100 | 20 | Tem 20% de chance de confundir o alvo. | |
| Magnitude Level 20 | | — | 100 | 30 | Acerta os Pokémon adjacentes. O Power varia; 2x em Dig. | |
| Rest Level 25 | | — | — | 5 | O usuário dorme por 2 turnos e restaura o seu HP e status. | |
| Snore Level 25 | | 50 | 100 | 15 | O usuário deve estar dormindo. Tem 30% de chance de causar flinch. | |
| Aqua Tail Level 28 | | 90 | 90 | 10 | Nenhum efeito adicional. | |
| Earthquake Level 32 | | 100 | 100 | 10 | Atinge Pokémon adjacentes. Causa o dobro de dano em Dig. | |
| Muddy Water Level 35 | | 90 | 85 | 10 | Tem 30% de chance de diminuir a accuracy dos adversários em 1 estágio. | |
| Future Sight Level 39 | | 120 | 100 | 10 | Ataca por dois turnos após ser usado. | |
| Fissure Level 44 | | — | 30 | 5 | Derrota o alvo em OHKO. Falha se o usuário tiver um level inferior. | |
| Machine | ||||||
|---|---|---|---|---|---|---|
| Move | Tipo | Categoria | Power | PP | Descrição | |
| Attract Machine | | — | 100 | 15 | Um alvo do gênero oposto fica apaixonado. | |
| Blizzard Machine | | 110 | 70 | 5 | Tem 10% de chance de congelar os adversários. Não erra na neve. | |
| Bulldoze Machine | | 60 | 100 | 20 | Tem 100% de chance de reduzir a Speed de adversários em 1 estágio. | |
| Confide Machine | | — | — | 20 | Reduz o Sp. Atk do alvo em 1 estágio. | |
| Dive Machine | | 80 | 100 | 10 | Mergulha no turno 1, ataca turno 2. | |
| Double Team Machine | | — | — | 15 | Aumenta a evasão do usuário em 1 estágio. | |
| Earthquake Machine | | 100 | 100 | 10 | Atinge Pokémon adjacentes. Causa o dobro de dano em Dig. | |
| Facade Machine | | 70 | 100 | 20 | O Power dobra se o usuário estiver com burn/poison/paralysis. | |
| Frustration Machine | | — | 100 | 20 | Se o usuário estiver com felicidade mínima, tem 102 de Power. | |
| Hail Machine | | — | — | 10 | Por 5 turnos, faz cair granizo. | |
| Hidden Power Machine | | 60 | 100 | 15 | O tipo deste Move varia com base nos IVs do usuário. | |
| Ice Beam Machine | | 90 | 100 | 10 | Tem 10% de chance de congelar o alvo. | |
| Protect Machine | | — | — | 10 | Impede que Moves afetem o usuário neste turno. | |
| Rain Dance Machine | | — | — | 5 | Durante 5 turnos, uma forte chuva empodera Moves do tipo Water. | |
| Rest Machine | | — | — | 5 | O usuário dorme por 2 turnos e restaura o seu HP e status. | |
| Return Machine | | — | 100 | 20 | Se o usuário estiver com felicidade máxima, tem 102 de Power. | |
| Rock Tomb Machine | | 60 | 95 | 15 | Tem 100% de chance de diminuir a Speed do alvo em 1 estágio. | |
| Round Machine | | 60 | 100 | 15 | O Power dobra se outros Pokémon tiverem usado Round neste turno. | |
| Sandstorm Machine | | — | — | 10 | Durante 5 turnos, cria uma tempestade de areia. Rock-types têm a Sp. Def aumentada em 1,5x. | |
| Scald Machine | | 80 | 100 | 15 | Tem 30% de chance de queimar o alvo. Descongela o alvo. | |
| Secret Power Machine | | 70 | 100 | 20 | O efeito varia conforme o terreno. Tem 30% de chance de paralisar. | |
| Sleep Talk Machine | | — | — | 10 | O usuário deve estar dormindo. Usa outro Move conhecido. | |
| Substitute Machine | | — | — | 10 | O usuário perde 1/4 de seu HP máximo para colocar um substitute. | |
| Surf Machine | | 90 | 100 | 15 | Atinge Pokémon adjacentes. Dano duplo em Dive. | |
| Swagger Machine | | — | 85 | 15 | Aumenta o Attack do alvo em 2 estágios e causa confusão. | |
| Toxic Machine | | — | 90 | 10 | Envenena gravemente o alvo. Poison-types não podem errar. | |
| Waterfall Machine | | 80 | 100 | 15 | Tem 20% de chance de causar flinch. | |
| Tutor | ||||||
|---|---|---|---|---|---|---|
| Move | Tipo | Categoria | Power | PP | Descrição | |
| Aqua Tail Tutor | | 90 | 90 | 10 | Nenhum efeito adicional. | |
| Bounce Tutor | | 85 | 85 | 5 | Salta no turno 1. Ataca no turno 2. Tem 30% de chance de paralisar. | |
| Earth Power Tutor | | 90 | 100 | 10 | Tem 10% de chance de diminuir a Sp. Def do alvo em 1 estágio. | |
| Icy Wind Tutor | | 55 | 95 | 15 | Tem 100% de chance de diminuir a Speed dos adversários em 1 estágio. | |
| Snore Tutor | | 50 | 100 | 15 | O usuário deve estar dormindo. Tem 30% de chance de causar flinch. | |
| Water Pulse Tutor | | 60 | 100 | 20 | Tem 20% de chance de confundir o alvo. | |
| Egg | ||||||
|---|---|---|---|---|---|---|
| Move | Tipo | Categoria | Power | PP | Descrição | |
| Dragon Dance Egg | | — | — | 20 | Aumenta o Attack e a Speed do usuário em 1 estágio. | |
| Earth Power Egg | | 90 | 100 | 10 | Tem 10% de chance de diminuir a Sp. Def do alvo em 1 estágio. | |
| Flail Egg | | — | 100 | 15 | Mais Power quanto menos HP o usuário tiver. | |
| Hydro Pump Egg | | 110 | 80 | 5 | Nenhum efeito adicional. | |
| Mud Shot Egg | | 55 | 95 | 15 | Tem 100% de chance de diminuir a Speed do alvo em 1 estágio. | |
| Muddy Water Egg | | 90 | 85 | 10 | Tem 30% de chance de diminuir a accuracy dos adversários em 1 estágio. | |
| Spark Egg | | 65 | 100 | 20 | Tem 30% de chance de paralisar o alvo. | |
| Take Down Egg | | 90 | 85 | 20 | Tem 1/4 de recoil. | |
| Thrash Egg | | 120 | 100 | 10 | Dura 2-3 turnos. Confunde o usuário depois. | |
| Whirlpool Egg | | 35 | 85 | 15 | Prende o alvo e causa dano por 4-5 turnos. | |
| Level up | ||||||
|---|---|---|---|---|---|---|
| Move | Tipo | Categoria | Power | PP | Descrição | |
| Mud-Slap Level 1 | | 20 | 100 | 10 | Tem 100% de chance de diminuir a Accuracy do alvo em 1 estágio. | |
| Mud Sport Level 6 | | — | — | 15 | Durante 5 turnos, Moves do tipo Electric têm 1/3 de Power. | |
| Water Sport Level 6 | | — | — | 15 | Por 5 turnos, moves do tipo Fire têm 1/3 de Power. | |
| Water Gun Level 10 | | 40 | 100 | 25 | Nenhum efeito adicional. | |
| Mud Bomb Level 14 | | 65 | 85 | 10 | Tem 30% de chance de diminuir a Accuracy do alvo em 1 estágio. | |
| Amnesia Level 18 | | — | — | 20 | Aumenta a Sp. Def do usuário em 2 estágios. | |
| Water Pulse Level 22 | | 60 | 100 | 20 | Tem 20% de chance de confundir o alvo. | |
| Magnitude Level 26 | | — | 100 | 30 | Acerta os Pokémon adjacentes. O Power varia; 2x em Dig. | |
| Rest Level 31 | | — | — | 5 | O usuário dorme por 2 turnos e restaura o seu HP e status. | |
| Snore Level 31 | | 50 | 100 | 15 | O usuário deve estar dormindo. Tem 30% de chance de causar flinch. | |
| Aqua Tail Level 35 | | 90 | 90 | 10 | Nenhum efeito adicional. | |
| Earthquake Level 39 | | 100 | 100 | 10 | Atinge Pokémon adjacentes. Causa o dobro de dano em Dig. | |
| Future Sight Level 43 | | 120 | 100 | 10 | Ataca por dois turnos após ser usado. | |
| Fissure Level 47 | | — | 30 | 5 | Derrota o alvo em OHKO. Falha se o usuário tiver um level inferior. | |
| Machine | ||||||
|---|---|---|---|---|---|---|
| Move | Tipo | Categoria | Power | PP | Descrição | |
| Attract Machine | | — | 100 | 15 | Um alvo do gênero oposto fica apaixonado. | |
| Blizzard Machine | | 110 | 70 | 5 | Tem 10% de chance de congelar os adversários. Não erra na neve. | |
| Bulldoze Machine | | 60 | 100 | 20 | Tem 100% de chance de reduzir a Speed de adversários em 1 estágio. | |
| Dive Machine | | 80 | 100 | 10 | Mergulha no turno 1, ataca turno 2. | |
| Double Team Machine | | — | — | 15 | Aumenta a evasão do usuário em 1 estágio. | |
| Earthquake Machine | | 100 | 100 | 10 | Atinge Pokémon adjacentes. Causa o dobro de dano em Dig. | |
| Facade Machine | | 70 | 100 | 20 | O Power dobra se o usuário estiver com burn/poison/paralysis. | |
| Frustration Machine | | — | 100 | 20 | Se o usuário estiver com felicidade mínima, tem 102 de Power. | |
| Hail Machine | | — | — | 10 | Por 5 turnos, faz cair granizo. | |
| Hidden Power Machine | | 60 | 100 | 15 | O tipo deste Move varia com base nos IVs do usuário. | |
| Ice Beam Machine | | 90 | 100 | 10 | Tem 10% de chance de congelar o alvo. | |
| Protect Machine | | — | — | 10 | Impede que Moves afetem o usuário neste turno. | |
| Rain Dance Machine | | — | — | 5 | Durante 5 turnos, uma forte chuva empodera Moves do tipo Water. | |
| Rest Machine | | — | — | 5 | O usuário dorme por 2 turnos e restaura o seu HP e status. | |
| Return Machine | | — | 100 | 20 | Se o usuário estiver com felicidade máxima, tem 102 de Power. | |
| Rock Tomb Machine | | 60 | 95 | 15 | Tem 100% de chance de diminuir a Speed do alvo em 1 estágio. | |
| Round Machine | | 60 | 100 | 15 | O Power dobra se outros Pokémon tiverem usado Round neste turno. | |
| Sandstorm Machine | | — | — | 10 | Durante 5 turnos, cria uma tempestade de areia. Rock-types têm a Sp. Def aumentada em 1,5x. | |
| Scald Machine | | 80 | 100 | 15 | Tem 30% de chance de queimar o alvo. Descongela o alvo. | |
| Substitute Machine | | — | — | 10 | O usuário perde 1/4 de seu HP máximo para colocar um substitute. | |
| Surf Machine | | 90 | 100 | 15 | Atinge Pokémon adjacentes. Dano duplo em Dive. | |
| Swagger Machine | | — | 85 | 15 | Aumenta o Attack do alvo em 2 estágios e causa confusão. | |
| Toxic Machine | | — | 90 | 10 | Envenena gravemente o alvo. Poison-types não podem errar. | |
| Waterfall Machine | | 80 | 100 | 15 | Tem 20% de chance de causar flinch. | |
| Tutor | ||||||
|---|---|---|---|---|---|---|
| Move | Tipo | Categoria | Power | PP | Descrição | |
| Aqua Tail Tutor | | 90 | 90 | 10 | Nenhum efeito adicional. | |
| Bounce Tutor | | 85 | 85 | 5 | Salta no turno 1. Ataca no turno 2. Tem 30% de chance de paralisar. | |
| Earth Power Tutor | | 90 | 100 | 10 | Tem 10% de chance de diminuir a Sp. Def do alvo em 1 estágio. | |
| Icy Wind Tutor | | 55 | 95 | 15 | Tem 100% de chance de diminuir a Speed dos adversários em 1 estágio. | |
| Sleep Talk Tutor | | — | — | 10 | O usuário deve estar dormindo. Usa outro Move conhecido. | |
| Snore Tutor | | 50 | 100 | 15 | O usuário deve estar dormindo. Tem 30% de chance de causar flinch. | |
| Egg | ||||||
|---|---|---|---|---|---|---|
| Move | Tipo | Categoria | Power | PP | Descrição | |
| Dragon Dance Egg | | — | — | 20 | Aumenta o Attack e a Speed do usuário em 1 estágio. | |
| Earth Power Egg | | 90 | 100 | 10 | Tem 10% de chance de diminuir a Sp. Def do alvo em 1 estágio. | |
| Flail Egg | | — | 100 | 15 | Mais Power quanto menos HP o usuário tiver. | |
| Hydro Pump Egg | | 110 | 80 | 5 | Nenhum efeito adicional. | |
| Mud Shot Egg | | 55 | 95 | 15 | Tem 100% de chance de diminuir a Speed do alvo em 1 estágio. | |
| Muddy Water Egg | | 90 | 85 | 10 | Tem 30% de chance de diminuir a accuracy dos adversários em 1 estágio. | |
| Spark Egg | | 65 | 100 | 20 | Tem 30% de chance de paralisar o alvo. | |
| Take Down Egg | | 90 | 85 | 20 | Tem 1/4 de recoil. | |
| Thrash Egg | | 120 | 100 | 10 | Dura 2-3 turnos. Confunde o usuário depois. | |
| Whirlpool Egg | | 35 | 85 | 15 | Prende o alvo e causa dano por 4-5 turnos. | |
| Level up | ||||||
|---|---|---|---|---|---|---|
| Move | Tipo | Categoria | Power | PP | Descrição | |
| Mud-Slap Level 1 | | 20 | 100 | 10 | Tem 100% de chance de diminuir a Accuracy do alvo em 1 estágio. | |
| Mud Sport Level 6 | | — | — | 15 | Durante 5 turnos, Moves do tipo Electric têm 1/3 de Power. | |
| Water Sport Level 6 | | — | — | 15 | Por 5 turnos, moves do tipo Fire têm 1/3 de Power. | |
| Water Gun Level 10 | | 40 | 100 | 25 | Nenhum efeito adicional. | |
| Mud Bomb Level 14 | | 65 | 85 | 10 | Tem 30% de chance de diminuir a Accuracy do alvo em 1 estágio. | |
| Amnesia Level 18 | | — | — | 20 | Aumenta a Sp. Def do usuário em 2 estágios. | |
| Water Pulse Level 22 | | 60 | 100 | 20 | Tem 20% de chance de confundir o alvo. | |
| Magnitude Level 26 | | — | 100 | 30 | Acerta os Pokémon adjacentes. O Power varia; 2x em Dig. | |
| Rest Level 31 | | — | — | 5 | O usuário dorme por 2 turnos e restaura o seu HP e status. | |
| Snore Level 31 | | 50 | 100 | 15 | O usuário deve estar dormindo. Tem 30% de chance de causar flinch. | |
| Aqua Tail Level 35 | | 90 | 90 | 10 | Nenhum efeito adicional. | |
| Earthquake Level 39 | | 100 | 100 | 10 | Atinge Pokémon adjacentes. Causa o dobro de dano em Dig. | |
| Future Sight Level 43 | | 120 | 100 | 10 | Ataca por dois turnos após ser usado. | |
| Fissure Level 47 | | — | 30 | 5 | Derrota o alvo em OHKO. Falha se o usuário tiver um level inferior. | |
| Machine | ||||||
|---|---|---|---|---|---|---|
| Move | Tipo | Categoria | Power | PP | Descrição | |
| Attract Machine | | — | 100 | 15 | Um alvo do gênero oposto fica apaixonado. | |
| Blizzard Machine | | 110 | 70 | 5 | Tem 10% de chance de congelar os adversários. Não erra na neve. | |
| Captivate Machine | | — | 100 | 20 | Reduz o Sp. Atk do(s) adversário(s) em 2 estágios se for(em) do gênero oposto. | |
| Double Team Machine | | — | — | 15 | Aumenta a evasão do usuário em 1 estágio. | |
| Earthquake Machine | | 100 | 100 | 10 | Atinge Pokémon adjacentes. Causa o dobro de dano em Dig. | |
| Endure Machine | | — | — | 10 | O usuário sobrevive aos ataques neste turno com pelo menos 1 HP. | |
| Facade Machine | | 70 | 100 | 20 | O Power dobra se o usuário estiver com burn/poison/paralysis. | |
| Frustration Machine | | — | 100 | 20 | Se o usuário estiver com felicidade mínima, tem 102 de Power. | |
| Hail Machine | | — | — | 10 | Por 5 turnos, faz cair granizo. | |
| Hidden Power Machine | | 60 | 100 | 15 | O tipo deste Move varia com base nos IVs do usuário. | |
| Ice Beam Machine | | 90 | 100 | 10 | Tem 10% de chance de congelar o alvo. | |
| Natural Gift Machine | | — | 100 | 15 | O Power e tipo dependem da Berry do usuário. | |
| Protect Machine | | — | — | 10 | Impede que Moves afetem o usuário neste turno. | |
| Rain Dance Machine | | — | — | 5 | Durante 5 turnos, uma forte chuva empodera Moves do tipo Water. | |
| Rest Machine | | — | — | 5 | O usuário dorme por 2 turnos e restaura o seu HP e status. | |
| Return Machine | | — | 100 | 20 | Se o usuário estiver com felicidade máxima, tem 102 de Power. | |
| Rock Tomb Machine | | 60 | 95 | 15 | Tem 100% de chance de diminuir a Speed do alvo em 1 estágio. | |
| Sandstorm Machine | | — | — | 10 | Durante 5 turnos, cria uma tempestade de areia. Rock-types têm a Sp. Def aumentada em 1,5x. | |
| Secret Power Machine | | 70 | 100 | 20 | O efeito varia conforme o terreno. Tem 30% de chance de paralisar. | |
| Sleep Talk Machine | | — | — | 10 | O usuário deve estar dormindo. Usa outro Move conhecido. | |
| Substitute Machine | | — | — | 10 | O usuário perde 1/4 de seu HP máximo para colocar um substitute. | |
| Surf Machine | | 90 | 100 | 15 | Atinge Pokémon adjacentes. Dano duplo em Dive. | |
| Swagger Machine | | — | 85 | 15 | Aumenta o Attack do alvo em 2 estágios e causa confusão. | |
| Toxic Machine | | — | 90 | 10 | Envenena gravemente o alvo. Poison-types não podem errar. | |
| Water Pulse Machine | | 60 | 100 | 20 | Tem 20% de chance de confundir o alvo. | |
| Waterfall Machine | | 80 | 100 | 15 | Tem 20% de chance de causar flinch. | |
| Egg | ||||||
|---|---|---|---|---|---|---|
| Move | Tipo | Categoria | Power | PP | Descrição | |
| Flail Egg | | — | 100 | 15 | Mais Power quanto menos HP o usuário tiver. | |
| Hydro Pump Egg | | 110 | 80 | 5 | Nenhum efeito adicional. | |
| Spark Egg | | 65 | 100 | 20 | Tem 30% de chance de paralisar o alvo. | |
| Take Down Egg | | 90 | 85 | 20 | Tem 1/4 de recoil. | |
| Thrash Egg | | 120 | 100 | 10 | Dura 2-3 turnos. Confunde o usuário depois. | |
| Whirlpool Egg | | 35 | 85 | 15 | Prende o alvo e causa dano por 4-5 turnos. | |
| Level up | ||||||
|---|---|---|---|---|---|---|
| Move | Tipo | Categoria | Power | PP | Descrição | |
| Mud-Slap Level 1 | | 20 | 100 | 10 | Tem 100% de chance de diminuir a Accuracy do alvo em 1 estágio. | |
| Mud Sport Level 6 | | — | — | 15 | Durante 5 turnos, Moves do tipo Electric têm 1/3 de Power. | |
| Water Sport Level 6 | | — | — | 15 | Por 5 turnos, moves do tipo Fire têm 1/3 de Power. | |
| Water Gun Level 10 | | 40 | 100 | 25 | Nenhum efeito adicional. | |
| Mud Bomb Level 14 | | 65 | 85 | 10 | Tem 30% de chance de diminuir a Accuracy do alvo em 1 estágio. | |
| Amnesia Level 18 | | — | — | 20 | Aumenta a Sp. Def do usuário em 2 estágios. | |
| Water Pulse Level 22 | | 60 | 100 | 20 | Tem 20% de chance de confundir o alvo. | |
| Magnitude Level 26 | | — | 100 | 30 | Acerta os Pokémon adjacentes. O Power varia; 2x em Dig. | |
| Rest Level 31 | | — | — | 5 | O usuário dorme por 2 turnos e restaura o seu HP e status. | |
| Snore Level 31 | | 50 | 100 | 15 | O usuário deve estar dormindo. Tem 30% de chance de causar flinch. | |
| Aqua Tail Level 35 | | 90 | 90 | 10 | Nenhum efeito adicional. | |
| Earthquake Level 39 | | 100 | 100 | 10 | Atinge Pokémon adjacentes. Causa o dobro de dano em Dig. | |
| Future Sight Level 43 | | 120 | 100 | 10 | Ataca por dois turnos após ser usado. | |
| Fissure Level 47 | | — | 30 | 5 | Derrota o alvo em OHKO. Falha se o usuário tiver um level inferior. | |
| Machine | ||||||
|---|---|---|---|---|---|---|
| Move | Tipo | Categoria | Power | PP | Descrição | |
| Attract Machine | | — | 100 | 15 | Um alvo do gênero oposto fica apaixonado. | |
| Blizzard Machine | | 110 | 70 | 5 | Tem 10% de chance de congelar os adversários. Não erra na neve. | |
| Captivate Machine | | — | 100 | 20 | Reduz o Sp. Atk do(s) adversário(s) em 2 estágios se for(em) do gênero oposto. | |
| Double Team Machine | | — | — | 15 | Aumenta a evasão do usuário em 1 estágio. | |
| Earthquake Machine | | 100 | 100 | 10 | Atinge Pokémon adjacentes. Causa o dobro de dano em Dig. | |
| Endure Machine | | — | — | 10 | O usuário sobrevive aos ataques neste turno com pelo menos 1 HP. | |
| Facade Machine | | 70 | 100 | 20 | O Power dobra se o usuário estiver com burn/poison/paralysis. | |
| Frustration Machine | | — | 100 | 20 | Se o usuário estiver com felicidade mínima, tem 102 de Power. | |
| Hail Machine | | — | — | 10 | Por 5 turnos, faz cair granizo. | |
| Hidden Power Machine | | 60 | 100 | 15 | O tipo deste Move varia com base nos IVs do usuário. | |
| Ice Beam Machine | | 90 | 100 | 10 | Tem 10% de chance de congelar o alvo. | |
| Natural Gift Machine | | — | 100 | 15 | O Power e tipo dependem da Berry do usuário. | |
| Protect Machine | | — | — | 10 | Impede que Moves afetem o usuário neste turno. | |
| Rain Dance Machine | | — | — | 5 | Durante 5 turnos, uma forte chuva empodera Moves do tipo Water. | |
| Rest Machine | | — | — | 5 | O usuário dorme por 2 turnos e restaura o seu HP e status. | |
| Return Machine | | — | 100 | 20 | Se o usuário estiver com felicidade máxima, tem 102 de Power. | |
| Rock Tomb Machine | | 60 | 95 | 15 | Tem 100% de chance de diminuir a Speed do alvo em 1 estágio. | |
| Sandstorm Machine | | — | — | 10 | Durante 5 turnos, cria uma tempestade de areia. Rock-types têm a Sp. Def aumentada em 1,5x. | |
| Secret Power Machine | | 70 | 100 | 20 | O efeito varia conforme o terreno. Tem 30% de chance de paralisar. | |
| Sleep Talk Machine | | — | — | 10 | O usuário deve estar dormindo. Usa outro Move conhecido. | |
| Substitute Machine | | — | — | 10 | O usuário perde 1/4 de seu HP máximo para colocar um substitute. | |
| Surf Machine | | 90 | 100 | 15 | Atinge Pokémon adjacentes. Dano duplo em Dive. | |
| Swagger Machine | | — | 85 | 15 | Aumenta o Attack do alvo em 2 estágios e causa confusão. | |
| Toxic Machine | | — | 90 | 10 | Envenena gravemente o alvo. Poison-types não podem errar. | |
| Water Pulse Machine | | 60 | 100 | 20 | Tem 20% de chance de confundir o alvo. | |
| Waterfall Machine | | 80 | 100 | 15 | Tem 20% de chance de causar flinch. | |
| Tutor | ||||||
|---|---|---|---|---|---|---|
| Move | Tipo | Categoria | Power | PP | Descrição | |
| Aqua Tail Tutor | | 90 | 90 | 10 | Nenhum efeito adicional. | |
| Bounce Tutor | | 85 | 85 | 5 | Salta no turno 1. Ataca no turno 2. Tem 30% de chance de paralisar. | |
| Dive Tutor | | 80 | 100 | 10 | Mergulha no turno 1, ataca turno 2. | |
| Earth Power Tutor | | 90 | 100 | 10 | Tem 10% de chance de diminuir a Sp. Def do alvo em 1 estágio. | |
| Icy Wind Tutor | | 55 | 95 | 15 | Tem 100% de chance de diminuir a Speed dos adversários em 1 estágio. | |
| Mud-Slap Tutor | | 20 | 100 | 10 | Tem 100% de chance de diminuir a Accuracy do alvo em 1 estágio. | |
| Snore Tutor | | 50 | 100 | 15 | O usuário deve estar dormindo. Tem 30% de chance de causar flinch. | |
| Egg | ||||||
|---|---|---|---|---|---|---|
| Move | Tipo | Categoria | Power | PP | Descrição | |
| Flail Egg | | — | 100 | 15 | Mais Power quanto menos HP o usuário tiver. | |
| Hydro Pump Egg | | 110 | 80 | 5 | Nenhum efeito adicional. | |
| Spark Egg | | 65 | 100 | 20 | Tem 30% de chance de paralisar o alvo. | |
| Take Down Egg | | 90 | 85 | 20 | Tem 1/4 de recoil. | |
| Thrash Egg | | 120 | 100 | 10 | Dura 2-3 turnos. Confunde o usuário depois. | |
| Whirlpool Egg | | 35 | 85 | 15 | Prende o alvo e causa dano por 4-5 turnos. | |
| Level up | ||||||
|---|---|---|---|---|---|---|
| Move | Tipo | Categoria | Power | PP | Descrição | |
| Mud-Slap Level 1 | | 20 | 100 | 10 | Tem 100% de chance de diminuir a Accuracy do alvo em 1 estágio. | |
| Mud Sport Level 6 | | — | — | 15 | Durante 5 turnos, Moves do tipo Electric têm 1/3 de Power. | |
| Water Sport Level 6 | | — | — | 15 | Por 5 turnos, moves do tipo Fire têm 1/3 de Power. | |
| Water Gun Level 10 | | 40 | 100 | 25 | Nenhum efeito adicional. | |
| Mud Bomb Level 14 | | 65 | 85 | 10 | Tem 30% de chance de diminuir a Accuracy do alvo em 1 estágio. | |
| Amnesia Level 18 | | — | — | 20 | Aumenta a Sp. Def do usuário em 2 estágios. | |
| Water Pulse Level 22 | | 60 | 100 | 20 | Tem 20% de chance de confundir o alvo. | |
| Magnitude Level 26 | | — | 100 | 30 | Acerta os Pokémon adjacentes. O Power varia; 2x em Dig. | |
| Rest Level 31 | | — | — | 5 | O usuário dorme por 2 turnos e restaura o seu HP e status. | |
| Snore Level 31 | | 50 | 100 | 15 | O usuário deve estar dormindo. Tem 30% de chance de causar flinch. | |
| Aqua Tail Level 35 | | 90 | 90 | 10 | Nenhum efeito adicional. | |
| Earthquake Level 39 | | 100 | 100 | 10 | Atinge Pokémon adjacentes. Causa o dobro de dano em Dig. | |
| Future Sight Level 43 | | 120 | 100 | 10 | Ataca por dois turnos após ser usado. | |
| Fissure Level 47 | | — | 30 | 5 | Derrota o alvo em OHKO. Falha se o usuário tiver um level inferior. | |
| Machine | ||||||
|---|---|---|---|---|---|---|
| Move | Tipo | Categoria | Power | PP | Descrição | |
| Attract Machine | | — | 100 | 15 | Um alvo do gênero oposto fica apaixonado. | |
| Blizzard Machine | | 110 | 70 | 5 | Tem 10% de chance de congelar os adversários. Não erra na neve. | |
| Captivate Machine | | — | 100 | 20 | Reduz o Sp. Atk do(s) adversário(s) em 2 estágios se for(em) do gênero oposto. | |
| Double Team Machine | | — | — | 15 | Aumenta a evasão do usuário em 1 estágio. | |
| Earthquake Machine | | 100 | 100 | 10 | Atinge Pokémon adjacentes. Causa o dobro de dano em Dig. | |
| Endure Machine | | — | — | 10 | O usuário sobrevive aos ataques neste turno com pelo menos 1 HP. | |
| Facade Machine | | 70 | 100 | 20 | O Power dobra se o usuário estiver com burn/poison/paralysis. | |
| Frustration Machine | | — | 100 | 20 | Se o usuário estiver com felicidade mínima, tem 102 de Power. | |
| Hail Machine | | — | — | 10 | Por 5 turnos, faz cair granizo. | |
| Hidden Power Machine | | 60 | 100 | 15 | O tipo deste Move varia com base nos IVs do usuário. | |
| Ice Beam Machine | | 90 | 100 | 10 | Tem 10% de chance de congelar o alvo. | |
| Natural Gift Machine | | — | 100 | 15 | O Power e tipo dependem da Berry do usuário. | |
| Protect Machine | | — | — | 10 | Impede que Moves afetem o usuário neste turno. | |
| Rain Dance Machine | | — | — | 5 | Durante 5 turnos, uma forte chuva empodera Moves do tipo Water. | |
| Rest Machine | | — | — | 5 | O usuário dorme por 2 turnos e restaura o seu HP e status. | |
| Return Machine | | — | 100 | 20 | Se o usuário estiver com felicidade máxima, tem 102 de Power. | |
| Rock Tomb Machine | | 60 | 95 | 15 | Tem 100% de chance de diminuir a Speed do alvo em 1 estágio. | |
| Sandstorm Machine | | — | — | 10 | Durante 5 turnos, cria uma tempestade de areia. Rock-types têm a Sp. Def aumentada em 1,5x. | |
| Secret Power Machine | | 70 | 100 | 20 | O efeito varia conforme o terreno. Tem 30% de chance de paralisar. | |
| Sleep Talk Machine | | — | — | 10 | O usuário deve estar dormindo. Usa outro Move conhecido. | |
| Substitute Machine | | — | — | 10 | O usuário perde 1/4 de seu HP máximo para colocar um substitute. | |
| Surf Machine | | 90 | 100 | 15 | Atinge Pokémon adjacentes. Dano duplo em Dive. | |
| Swagger Machine | | — | 85 | 15 | Aumenta o Attack do alvo em 2 estágios e causa confusão. | |
| Toxic Machine | | — | 90 | 10 | Envenena gravemente o alvo. Poison-types não podem errar. | |
| Water Pulse Machine | | 60 | 100 | 20 | Tem 20% de chance de confundir o alvo. | |
| Waterfall Machine | | 80 | 100 | 15 | Tem 20% de chance de causar flinch. | |
| Whirlpool Machine | | 35 | 85 | 15 | Prende o alvo e causa dano por 4-5 turnos. | |
| Tutor | ||||||
|---|---|---|---|---|---|---|
| Move | Tipo | Categoria | Power | PP | Descrição | |
| Aqua Tail Tutor | | 90 | 90 | 10 | Nenhum efeito adicional. | |
| Bounce Tutor | | 85 | 85 | 5 | Salta no turno 1. Ataca no turno 2. Tem 30% de chance de paralisar. | |
| Dive Tutor | | 80 | 100 | 10 | Mergulha no turno 1, ataca turno 2. | |
| Earth Power Tutor | | 90 | 100 | 10 | Tem 10% de chance de diminuir a Sp. Def do alvo em 1 estágio. | |
| Headbutt Tutor | | 70 | 100 | 15 | Tem 30% de chance de causar flinch. | |
| Icy Wind Tutor | | 55 | 95 | 15 | Tem 100% de chance de diminuir a Speed dos adversários em 1 estágio. | |
| Mud-Slap Tutor | | 20 | 100 | 10 | Tem 100% de chance de diminuir a Accuracy do alvo em 1 estágio. | |
| Snore Tutor | | 50 | 100 | 15 | O usuário deve estar dormindo. Tem 30% de chance de causar flinch. | |
| Egg | ||||||
|---|---|---|---|---|---|---|
| Move | Tipo | Categoria | Power | PP | Descrição | |
| Dragon Dance Egg | | — | — | 20 | Aumenta o Attack e a Speed do usuário em 1 estágio. | |
| Flail Egg | | — | 100 | 15 | Mais Power quanto menos HP o usuário tiver. | |
| Hydro Pump Egg | | 110 | 80 | 5 | Nenhum efeito adicional. | |
| Spark Egg | | 65 | 100 | 20 | Tem 30% de chance de paralisar o alvo. | |
| Take Down Egg | | 90 | 85 | 20 | Tem 1/4 de recoil. | |
| Thrash Egg | | 120 | 100 | 10 | Dura 2-3 turnos. Confunde o usuário depois. | |
| Whirlpool Egg | | 35 | 85 | 15 | Prende o alvo e causa dano por 4-5 turnos. | |
| Level up | ||||||
|---|---|---|---|---|---|---|
| Move | Tipo | Categoria | Power | PP | Descrição | |
| Mud-Slap Level 1 | | 20 | 100 | 10 | Tem 100% de chance de diminuir a Accuracy do alvo em 1 estágio. | |
| Mud Sport Level 6 | | — | — | 15 | Durante 5 turnos, Moves do tipo Electric têm 1/3 de Power. | |
| Water Sport Level 6 | | — | — | 15 | Por 5 turnos, moves do tipo Fire têm 1/3 de Power. | |
| Water Gun Level 11 | | 40 | 100 | 25 | Nenhum efeito adicional. | |
| Magnitude Level 16 | | — | 100 | 30 | Acerta os Pokémon adjacentes. O Power varia; 2x em Dig. | |
| Amnesia Level 21 | | — | — | 20 | Aumenta a Sp. Def do usuário em 2 estágios. | |
| Rest Level 26 | | — | — | 5 | O usuário dorme por 2 turnos e restaura o seu HP e status. | |
| Snore Level 26 | | 50 | 100 | 15 | O usuário deve estar dormindo. Tem 30% de chance de causar flinch. | |
| Earthquake Level 31 | | 100 | 100 | 10 | Atinge Pokémon adjacentes. Causa o dobro de dano em Dig. | |
| Future Sight Level 36 | | 120 | 100 | 10 | Ataca por dois turnos após ser usado. | |
| Fissure Level 41 | | — | 30 | 5 | Derrota o alvo em OHKO. Falha se o usuário tiver um level inferior. | |
| Machine | ||||||
|---|---|---|---|---|---|---|
| Move | Tipo | Categoria | Power | PP | Descrição | |
| Attract Machine | | — | 100 | 15 | Um alvo do gênero oposto fica apaixonado. | |
| Blizzard Machine | | 110 | 70 | 5 | Tem 10% de chance de congelar os adversários. Não erra na neve. | |
| Dive Machine | | 80 | 100 | 10 | Mergulha no turno 1, ataca turno 2. | |
| Double Team Machine | | — | — | 15 | Aumenta a evasão do usuário em 1 estágio. | |
| Earthquake Machine | | 100 | 100 | 10 | Atinge Pokémon adjacentes. Causa o dobro de dano em Dig. | |
| Facade Machine | | 70 | 100 | 20 | O Power dobra se o usuário estiver com burn/poison/paralysis. | |
| Frustration Machine | | — | 100 | 20 | Se o usuário estiver com felicidade mínima, tem 102 de Power. | |
| Hail Machine | | — | — | 10 | Por 5 turnos, faz cair granizo. | |
| Hidden Power Machine | | 60 | 100 | 15 | O tipo deste Move varia com base nos IVs do usuário. | |
| Ice Beam Machine | | 90 | 100 | 10 | Tem 10% de chance de congelar o alvo. | |
| Protect Machine | | — | — | 10 | Impede que Moves afetem o usuário neste turno. | |
| Rain Dance Machine | | — | — | 5 | Durante 5 turnos, uma forte chuva empodera Moves do tipo Water. | |
| Rest Machine | | — | — | 5 | O usuário dorme por 2 turnos e restaura o seu HP e status. | |
| Return Machine | | — | 100 | 20 | Se o usuário estiver com felicidade máxima, tem 102 de Power. | |
| Rock Tomb Machine | | 60 | 95 | 15 | Tem 100% de chance de diminuir a Speed do alvo em 1 estágio. | |
| Sandstorm Machine | | — | — | 10 | Durante 5 turnos, cria uma tempestade de areia. Rock-types têm a Sp. Def aumentada em 1,5x. | |
| Secret Power Machine | | 70 | 100 | 20 | O efeito varia conforme o terreno. Tem 30% de chance de paralisar. | |
| Surf Machine | | 90 | 100 | 15 | Atinge Pokémon adjacentes. Dano duplo em Dive. | |
| Toxic Machine | | — | 90 | 10 | Envenena gravemente o alvo. Poison-types não podem errar. | |
| Water Pulse Machine | | 60 | 100 | 20 | Tem 20% de chance de confundir o alvo. | |
| Waterfall Machine | | 80 | 100 | 15 | Tem 20% de chance de causar flinch. | |
| Egg | ||||||
|---|---|---|---|---|---|---|
| Move | Tipo | Categoria | Power | PP | Descrição | |
| Spark Egg | | 65 | 100 | 20 | Tem 30% de chance de paralisar o alvo. | |
| Thrash Egg | | 120 | 100 | 10 | Dura 2-3 turnos. Confunde o usuário depois. | |
| Whirlpool Egg | | 35 | 85 | 15 | Prende o alvo e causa dano por 4-5 turnos. | |
| Level up | ||||||
|---|---|---|---|---|---|---|
| Move | Tipo | Categoria | Power | PP | Descrição | |
| Mud-Slap Level 1 | | 20 | 100 | 10 | Tem 100% de chance de diminuir a Accuracy do alvo em 1 estágio. | |
| Mud Sport Level 6 | | — | — | 15 | Durante 5 turnos, Moves do tipo Electric têm 1/3 de Power. | |
| Water Sport Level 6 | | — | — | 15 | Por 5 turnos, moves do tipo Fire têm 1/3 de Power. | |
| Water Gun Level 11 | | 40 | 100 | 25 | Nenhum efeito adicional. | |
| Magnitude Level 16 | | — | 100 | 30 | Acerta os Pokémon adjacentes. O Power varia; 2x em Dig. | |
| Amnesia Level 21 | | — | — | 20 | Aumenta a Sp. Def do usuário em 2 estágios. | |
| Rest Level 26 | | — | — | 5 | O usuário dorme por 2 turnos e restaura o seu HP e status. | |
| Snore Level 26 | | 50 | 100 | 15 | O usuário deve estar dormindo. Tem 30% de chance de causar flinch. | |
| Earthquake Level 31 | | 100 | 100 | 10 | Atinge Pokémon adjacentes. Causa o dobro de dano em Dig. | |
| Future Sight Level 36 | | 120 | 100 | 10 | Ataca por dois turnos após ser usado. | |
| Fissure Level 41 | | — | 30 | 5 | Derrota o alvo em OHKO. Falha se o usuário tiver um level inferior. | |
| Machine | ||||||
|---|---|---|---|---|---|---|
| Move | Tipo | Categoria | Power | PP | Descrição | |
| Attract Machine | | — | 100 | 15 | Um alvo do gênero oposto fica apaixonado. | |
| Blizzard Machine | | 110 | 70 | 5 | Tem 10% de chance de congelar os adversários. Não erra na neve. | |
| Dive Machine | | 80 | 100 | 10 | Mergulha no turno 1, ataca turno 2. | |
| Double Team Machine | | — | — | 15 | Aumenta a evasão do usuário em 1 estágio. | |
| Earthquake Machine | | 100 | 100 | 10 | Atinge Pokémon adjacentes. Causa o dobro de dano em Dig. | |
| Facade Machine | | 70 | 100 | 20 | O Power dobra se o usuário estiver com burn/poison/paralysis. | |
| Frustration Machine | | — | 100 | 20 | Se o usuário estiver com felicidade mínima, tem 102 de Power. | |
| Hail Machine | | — | — | 10 | Por 5 turnos, faz cair granizo. | |
| Hidden Power Machine | | 60 | 100 | 15 | O tipo deste Move varia com base nos IVs do usuário. | |
| Ice Beam Machine | | 90 | 100 | 10 | Tem 10% de chance de congelar o alvo. | |
| Protect Machine | | — | — | 10 | Impede que Moves afetem o usuário neste turno. | |
| Rain Dance Machine | | — | — | 5 | Durante 5 turnos, uma forte chuva empodera Moves do tipo Water. | |
| Rest Machine | | — | — | 5 | O usuário dorme por 2 turnos e restaura o seu HP e status. | |
| Return Machine | | — | 100 | 20 | Se o usuário estiver com felicidade máxima, tem 102 de Power. | |
| Rock Tomb Machine | | 60 | 95 | 15 | Tem 100% de chance de diminuir a Speed do alvo em 1 estágio. | |
| Sandstorm Machine | | — | — | 10 | Durante 5 turnos, cria uma tempestade de areia. Rock-types têm a Sp. Def aumentada em 1,5x. | |
| Secret Power Machine | | 70 | 100 | 20 | O efeito varia conforme o terreno. Tem 30% de chance de paralisar. | |
| Surf Machine | | 90 | 100 | 15 | Atinge Pokémon adjacentes. Dano duplo em Dive. | |
| Toxic Machine | | — | 90 | 10 | Envenena gravemente o alvo. Poison-types não podem errar. | |
| Water Pulse Machine | | 60 | 100 | 20 | Tem 20% de chance de confundir o alvo. | |
| Waterfall Machine | | 80 | 100 | 15 | Tem 20% de chance de causar flinch. | |
| Tutor | ||||||
|---|---|---|---|---|---|---|
| Move | Tipo | Categoria | Power | PP | Descrição | |
| Double-Edge Tutor | | 120 | 100 | 15 | Tem 33% de recoil. | |
| Endure Tutor | | — | — | 10 | O usuário sobrevive aos ataques neste turno com pelo menos 1 HP. | |
| Icy Wind Tutor | | 55 | 95 | 15 | Tem 100% de chance de diminuir a Speed dos adversários em 1 estágio. | |
| Mimic Tutor | | — | — | 10 | O último Move que o alvo usou substitui este. | |
| Mud-Slap Tutor | | 20 | 100 | 10 | Tem 100% de chance de diminuir a Accuracy do alvo em 1 estágio. | |
| Sleep Talk Tutor | | — | — | 10 | O usuário deve estar dormindo. Usa outro Move conhecido. | |
| Snore Tutor | | 50 | 100 | 15 | O usuário deve estar dormindo. Tem 30% de chance de causar flinch. | |
| Substitute Tutor | | — | — | 10 | O usuário perde 1/4 de seu HP máximo para colocar um substitute. | |
| Swagger Tutor | | — | 85 | 15 | Aumenta o Attack do alvo em 2 estágios e causa confusão. | |
| Egg | ||||||
|---|---|---|---|---|---|---|
| Move | Tipo | Categoria | Power | PP | Descrição | |
| Spark Egg | | 65 | 100 | 20 | Tem 30% de chance de paralisar o alvo. | |
| Thrash Egg | | 120 | 100 | 10 | Dura 2-3 turnos. Confunde o usuário depois. | |
| Whirlpool Egg | | 35 | 85 | 15 | Prende o alvo e causa dano por 4-5 turnos. | |
| Level up | ||||||
|---|---|---|---|---|---|---|
| Move | Tipo | Categoria | Power | PP | Descrição | |
| Mud-Slap Level 1 | | 20 | 100 | 10 | Tem 100% de chance de diminuir a Accuracy do alvo em 1 estágio. | |
| Mud Sport Level 6 | | — | — | 15 | Durante 5 turnos, Moves do tipo Electric têm 1/3 de Power. | |
| Water Sport Level 6 | | — | — | 15 | Por 5 turnos, moves do tipo Fire têm 1/3 de Power. | |
| Water Gun Level 11 | | 40 | 100 | 25 | Nenhum efeito adicional. | |
| Magnitude Level 16 | | — | 100 | 30 | Acerta os Pokémon adjacentes. O Power varia; 2x em Dig. | |
| Amnesia Level 21 | | — | — | 20 | Aumenta a Sp. Def do usuário em 2 estágios. | |
| Rest Level 26 | | — | — | 5 | O usuário dorme por 2 turnos e restaura o seu HP e status. | |
| Snore Level 26 | | 50 | 100 | 15 | O usuário deve estar dormindo. Tem 30% de chance de causar flinch. | |
| Earthquake Level 31 | | 100 | 100 | 10 | Atinge Pokémon adjacentes. Causa o dobro de dano em Dig. | |
| Future Sight Level 36 | | 120 | 100 | 10 | Ataca por dois turnos após ser usado. | |
| Fissure Level 41 | | — | 30 | 5 | Derrota o alvo em OHKO. Falha se o usuário tiver um level inferior. | |
| Machine | ||||||
|---|---|---|---|---|---|---|
| Move | Tipo | Categoria | Power | PP | Descrição | |
| Attract Machine | | — | 100 | 15 | Um alvo do gênero oposto fica apaixonado. | |
| Blizzard Machine | | 110 | 70 | 5 | Tem 10% de chance de congelar os adversários. Não erra na neve. | |
| Dive Machine | | 80 | 100 | 10 | Mergulha no turno 1, ataca turno 2. | |
| Double Team Machine | | — | — | 15 | Aumenta a evasão do usuário em 1 estágio. | |
| Earthquake Machine | | 100 | 100 | 10 | Atinge Pokémon adjacentes. Causa o dobro de dano em Dig. | |
| Facade Machine | | 70 | 100 | 20 | O Power dobra se o usuário estiver com burn/poison/paralysis. | |
| Frustration Machine | | — | 100 | 20 | Se o usuário estiver com felicidade mínima, tem 102 de Power. | |
| Hail Machine | | — | — | 10 | Por 5 turnos, faz cair granizo. | |
| Hidden Power Machine | | 60 | 100 | 15 | O tipo deste Move varia com base nos IVs do usuário. | |
| Ice Beam Machine | | 90 | 100 | 10 | Tem 10% de chance de congelar o alvo. | |
| Protect Machine | | — | — | 10 | Impede que Moves afetem o usuário neste turno. | |
| Rain Dance Machine | | — | — | 5 | Durante 5 turnos, uma forte chuva empodera Moves do tipo Water. | |
| Rest Machine | | — | — | 5 | O usuário dorme por 2 turnos e restaura o seu HP e status. | |
| Return Machine | | — | 100 | 20 | Se o usuário estiver com felicidade máxima, tem 102 de Power. | |
| Rock Tomb Machine | | 60 | 95 | 15 | Tem 100% de chance de diminuir a Speed do alvo em 1 estágio. | |
| Sandstorm Machine | | — | — | 10 | Durante 5 turnos, cria uma tempestade de areia. Rock-types têm a Sp. Def aumentada em 1,5x. | |
| Secret Power Machine | | 70 | 100 | 20 | O efeito varia conforme o terreno. Tem 30% de chance de paralisar. | |
| Surf Machine | | 90 | 100 | 15 | Atinge Pokémon adjacentes. Dano duplo em Dive. | |
| Toxic Machine | | — | 90 | 10 | Envenena gravemente o alvo. Poison-types não podem errar. | |
| Water Pulse Machine | | 60 | 100 | 20 | Tem 20% de chance de confundir o alvo. | |
| Waterfall Machine | | 80 | 100 | 15 | Tem 20% de chance de causar flinch. | |
| Tutor | ||||||
|---|---|---|---|---|---|---|
| Move | Tipo | Categoria | Power | PP | Descrição | |
| Double-Edge Tutor | | 120 | 100 | 15 | Tem 33% de recoil. | |
| Mimic Tutor | | — | — | 10 | O último Move que o alvo usou substitui este. | |
| Substitute Tutor | | — | — | 10 | O usuário perde 1/4 de seu HP máximo para colocar um substitute. | |
| Egg | ||||||
|---|---|---|---|---|---|---|
| Move | Tipo | Categoria | Power | PP | Descrição | |
| Spark Egg | | 65 | 100 | 20 | Tem 30% de chance de paralisar o alvo. | |
| Thrash Egg | | 120 | 100 | 10 | Dura 2-3 turnos. Confunde o usuário depois. | |
| Whirlpool Egg | | 35 | 85 | 15 | Prende o alvo e causa dano por 4-5 turnos. | |
| Level up | ||||||
|---|---|---|---|---|---|---|
| Move | Tipo | Categoria | Power | PP | Descrição | |
| Mud-Slap Level 1 | | 20 | 100 | 10 | Tem 100% de chance de diminuir a Accuracy do alvo em 1 estágio. | |
| Mud Sport Level 6 | | — | — | 15 | Durante 5 turnos, Moves do tipo Electric têm 1/3 de Power. | |
| Water Sport Level 6 | | — | — | 15 | Por 5 turnos, moves do tipo Fire têm 1/3 de Power. | |
| Water Gun Level 11 | | 40 | 100 | 25 | Nenhum efeito adicional. | |
| Magnitude Level 16 | | — | 100 | 30 | Acerta os Pokémon adjacentes. O Power varia; 2x em Dig. | |
| Amnesia Level 21 | | — | — | 20 | Aumenta a Sp. Def do usuário em 2 estágios. | |
| Rest Level 26 | | — | — | 5 | O usuário dorme por 2 turnos e restaura o seu HP e status. | |
| Snore Level 26 | | 50 | 100 | 15 | O usuário deve estar dormindo. Tem 30% de chance de causar flinch. | |
| Earthquake Level 31 | | 100 | 100 | 10 | Atinge Pokémon adjacentes. Causa o dobro de dano em Dig. | |
| Future Sight Level 36 | | 120 | 100 | 10 | Ataca por dois turnos após ser usado. | |
| Fissure Level 41 | | — | 30 | 5 | Derrota o alvo em OHKO. Falha se o usuário tiver um level inferior. | |
| Machine | ||||||
|---|---|---|---|---|---|---|
| Move | Tipo | Categoria | Power | PP | Descrição | |
| Attract Machine | | — | 100 | 15 | Um alvo do gênero oposto fica apaixonado. | |
| Blizzard Machine | | 110 | 70 | 5 | Tem 10% de chance de congelar os adversários. Não erra na neve. | |
| Dive Machine | | 80 | 100 | 10 | Mergulha no turno 1, ataca turno 2. | |
| Double Team Machine | | — | — | 15 | Aumenta a evasão do usuário em 1 estágio. | |
| Earthquake Machine | | 100 | 100 | 10 | Atinge Pokémon adjacentes. Causa o dobro de dano em Dig. | |
| Facade Machine | | 70 | 100 | 20 | O Power dobra se o usuário estiver com burn/poison/paralysis. | |
| Frustration Machine | | — | 100 | 20 | Se o usuário estiver com felicidade mínima, tem 102 de Power. | |
| Hail Machine | | — | — | 10 | Por 5 turnos, faz cair granizo. | |
| Hidden Power Machine | | 60 | 100 | 15 | O tipo deste Move varia com base nos IVs do usuário. | |
| Ice Beam Machine | | 90 | 100 | 10 | Tem 10% de chance de congelar o alvo. | |
| Protect Machine | | — | — | 10 | Impede que Moves afetem o usuário neste turno. | |
| Rain Dance Machine | | — | — | 5 | Durante 5 turnos, uma forte chuva empodera Moves do tipo Water. | |
| Rest Machine | | — | — | 5 | O usuário dorme por 2 turnos e restaura o seu HP e status. | |
| Return Machine | | — | 100 | 20 | Se o usuário estiver com felicidade máxima, tem 102 de Power. | |
| Rock Tomb Machine | | 60 | 95 | 15 | Tem 100% de chance de diminuir a Speed do alvo em 1 estágio. | |
| Sandstorm Machine | | — | — | 10 | Durante 5 turnos, cria uma tempestade de areia. Rock-types têm a Sp. Def aumentada em 1,5x. | |
| Secret Power Machine | | 70 | 100 | 20 | O efeito varia conforme o terreno. Tem 30% de chance de paralisar. | |
| Surf Machine | | 90 | 100 | 15 | Atinge Pokémon adjacentes. Dano duplo em Dive. | |
| Toxic Machine | | — | 90 | 10 | Envenena gravemente o alvo. Poison-types não podem errar. | |
| Water Pulse Machine | | 60 | 100 | 20 | Tem 20% de chance de confundir o alvo. | |
| Waterfall Machine | | 80 | 100 | 15 | Tem 20% de chance de causar flinch. | |
| Tutor | ||||||
|---|---|---|---|---|---|---|
| Move | Tipo | Categoria | Power | PP | Descrição | |
| Double-Edge Tutor | | 120 | 100 | 15 | Tem 33% de recoil. | |
| Icy Wind Tutor | | 55 | 95 | 15 | Tem 100% de chance de diminuir a Speed dos adversários em 1 estágio. | |
| Mimic Tutor | | — | — | 10 | O último Move que o alvo usou substitui este. | |
| Substitute Tutor | | — | — | 10 | O usuário perde 1/4 de seu HP máximo para colocar um substitute. | |
| Swagger Tutor | | — | 85 | 15 | Aumenta o Attack do alvo em 2 estágios e causa confusão. | |
| Level up | ||||||
|---|---|---|---|---|---|---|
| Move | Tipo | Categoria | Power | PP | Descrição | |
| Water Gun Level 1 | | 40 | 100 | 25 | Nenhum efeito adicional. | |
| Mud-Slap Level 1 | | 20 | 100 | 10 | Tem 100% de chance de diminuir a Accuracy do alvo em 1 estágio. | |
| Rest Level 6 | | — | — | 5 | O usuário dorme por 2 turnos e restaura o seu HP e status. | |
| Snore Level 6 | | 50 | 100 | 15 | O usuário deve estar dormindo. Tem 30% de chance de causar flinch. | |
| Water Pulse Level 12 | | 60 | 100 | 20 | Tem 20% de chance de confundir o alvo. | |
| Amnesia Level 18 | | — | — | 20 | Aumenta a Sp. Def do usuário em 2 estágios. | |
| Aqua Tail Level 24 | | 90 | 90 | 10 | Nenhum efeito adicional. | |
| Muddy Water Level 31 | | 90 | 85 | 10 | Tem 30% de chance de diminuir a accuracy dos adversários em 1 estágio. | |
| Earthquake Level 36 | | 100 | 100 | 10 | Atinge Pokémon adjacentes. Causa o dobro de dano em Dig. | |
| Future Sight Level 42 | | 120 | 100 | 10 | Ataca por dois turnos após ser usado. | |
| Fissure Level 48 | | — | 30 | 5 | Derrota o alvo em OHKO. Falha se o usuário tiver um level inferior. | |
| Machine | ||||||
|---|---|---|---|---|---|---|
| Move | Tipo | Categoria | Power | PP | Descrição | |
| Attract Machine | | — | 100 | 15 | Um alvo do gênero oposto fica apaixonado. | |
| Blizzard Machine | | 110 | 70 | 5 | Tem 10% de chance de congelar os adversários. Não erra na neve. | |
| Bulldoze Machine | | 60 | 100 | 20 | Tem 100% de chance de reduzir a Speed de adversários em 1 estágio. | |
| Double Team Machine | | — | — | 15 | Aumenta a evasão do usuário em 1 estágio. | |
| Earthquake Machine | | 100 | 100 | 10 | Atinge Pokémon adjacentes. Causa o dobro de dano em Dig. | |
| Endure Machine | | — | — | 10 | O usuário sobrevive aos ataques neste turno com pelo menos 1 HP. | |
| Facade Machine | | 70 | 100 | 20 | O Power dobra se o usuário estiver com burn/poison/paralysis. | |
| Hail Machine | | — | — | 10 | Por 5 turnos, faz cair granizo. | |
| Ice Beam Machine | | 90 | 100 | 10 | Tem 10% de chance de congelar o alvo. | |
| Protect Machine | | — | — | 10 | Impede que Moves afetem o usuário neste turno. | |
| Rain Dance Machine | | — | — | 5 | Durante 5 turnos, uma forte chuva empodera Moves do tipo Water. | |
| Rest Machine | | — | — | 5 | O usuário dorme por 2 turnos e restaura o seu HP e status. | |
| Rock Tomb Machine | | 60 | 95 | 15 | Tem 100% de chance de diminuir a Speed do alvo em 1 estágio. | |
| Sandstorm Machine | | — | — | 10 | Durante 5 turnos, cria uma tempestade de areia. Rock-types têm a Sp. Def aumentada em 1,5x. | |
| Scald Machine | | 80 | 100 | 15 | Tem 30% de chance de queimar o alvo. Descongela o alvo. | |
| Sleep Talk Machine | | — | — | 10 | O usuário deve estar dormindo. Usa outro Move conhecido. | |
| Substitute Machine | | — | — | 10 | O usuário perde 1/4 de seu HP máximo para colocar um substitute. | |
| Surf Machine | | 90 | 100 | 15 | Atinge Pokémon adjacentes. Dano duplo em Dive. | |
| Swagger Machine | | — | 85 | 15 | Aumenta o Attack do alvo em 2 estágios e causa confusão. | |
| Water Pulse Machine | | 60 | 100 | 20 | Tem 20% de chance de confundir o alvo. | |
| Waterfall Machine | | 80 | 100 | 15 | Tem 20% de chance de causar flinch. | |
| Egg | ||||||
|---|---|---|---|---|---|---|
| Move | Tipo | Categoria | Power | PP | Descrição | |
| Dragon Dance Egg | | — | — | 20 | Aumenta o Attack e a Speed do usuário em 1 estágio. | |
| Earth Power Egg | | 90 | 100 | 10 | Tem 10% de chance de diminuir a Sp. Def do alvo em 1 estágio. | |
| Flail Egg | | — | 100 | 15 | Mais Power quanto menos HP o usuário tiver. | |
| Hydro Pump Egg | | 110 | 80 | 5 | Nenhum efeito adicional. | |
| Mud Shot Egg | | 55 | 95 | 15 | Tem 100% de chance de diminuir a Speed do alvo em 1 estágio. | |
| Muddy Water Egg | | 90 | 85 | 10 | Tem 30% de chance de diminuir a accuracy dos adversários em 1 estágio. | |
| Spark Egg | | 65 | 100 | 20 | Tem 30% de chance de paralisar o alvo. | |
| Take Down Egg | | 90 | 85 | 20 | Tem 1/4 de recoil. | |
| Thrash Egg | | 120 | 100 | 10 | Dura 2-3 turnos. Confunde o usuário depois. | |
| Whirlpool Egg | | 35 | 85 | 15 | Prende o alvo e causa dano por 4-5 turnos. | |